
Mosaics, by nature, refer to stones, tiles, etc., that have been cut apart, and then mortared together to achieve a picture. Although artists of various kinds can also make mosaics that don't require stones. One of the techniques to use is paint. Here I'll share with you four different ways that you can create a mosaic painting. Each one has their own unique look.
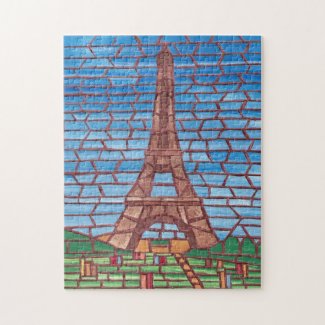
In this first technique, I painted my "stones" by painting variegated colors on sheets of canvas. You can use a variety of colors, and give them different colors, blends, and/or textures to find the look that you are going for. I then drew my design on a new sheet of canvas, cut my "stones" apart with scissors, from the painted canvases. Then I glued them in place to make my Eiffel Tower design.
Here it is pictured on jigsaw puzzles for some added fun.
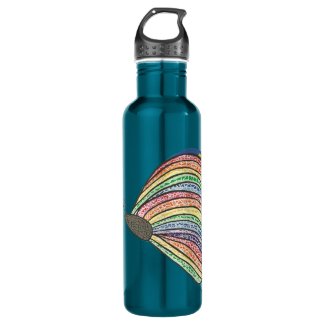
With this next design, I started with an initial butterfly drawing, and painted in strips of color on the wings, I painted a darker color on the body. I then applied a crackle medium for acrylic paints. After it is applied, the paint will start to separate and little lines will appear - making the paint look like it is breaking apart. That is the beginning of the mosaic look here.
I then went in and painted the cracked areas of the body, with black.
I added a lighter mortar colored paint to outline the colors on the wings. Here it is printed on stainless steel water bottles. You can choose from a variety of colors for the bottle.
In many mosaics, the glass has a see through or translucent look.
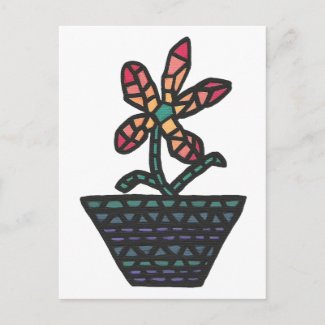
In this flower painting that I did, I used a floating medium for acrylic paints to achieve a translucent look. It is a clear gel like liquid, that helps acrylic paint to look like water colors. You can also use extenders and blending mediums, but I prefer the thickness of the floating medium for this technique.
You can mix it directly into the paint, or as I did in this painting, apply it directly to the canvas first, and then add apply the paint on top of it, while both are still wet.
Once I got my "cut tiles" filled in, I outlined the pieces in black. Here it is printed on postcards.
The first mosaic painting that I did was one of gem stones.
I started by drawing circles on my canvas. That was going to give me the background for arranging the "gem stones."
There was no crackle medium or floating medium used in this painting. All the shading and highlights were done simply by blending the acrylic paint directly on the canvas.
In this mosaic painting, the "tiles" do not fill in the whole area. Also, I made some of the stones round, which would normally be kind of hard, if someone were cutting out actual tile. However, mosaics can be made from a variety of mediums, including round stones and pebbles.
Once I completed this painting, I varnished the black area with a matte varnish, and the stones with a gloss varnish, for an enhanced effect.
Here it is printed on stickers.

Which is your favorite look? Which mosaic technique would you like to try?
Cheryl Paton