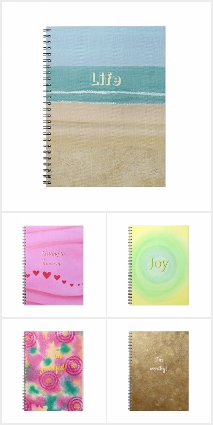
Here you will find a variety of journal notebooks for writing. Each notebook has a distinct cover with text that can be customized with your own message.
When customizing the text that has a shadow look to the letters, be sure to update both colors of letters when customizing the text.
These journals measure 6.5 by 8.75 inches, have 80 black and white lined pages, and lay flat when open with a spiral binding. The lines are college ruled.
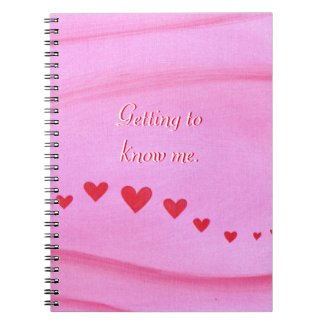
This first design is great for those who love hearts. It features a wave of red hearts in various sizes on blends of pink and red. The text says, Getting to know me, and is a great choice for those wanting to become more self aware.
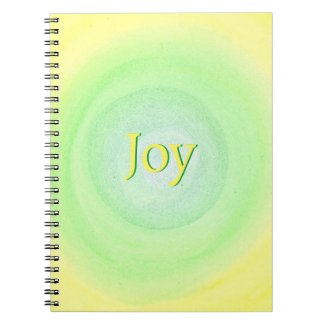
The Joy design features the word Joy written in yellow letters with shadow letters in green. The background is spheres of light green on yellow.
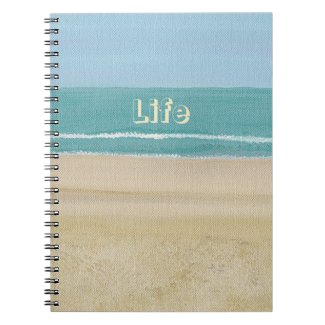
This third design features a beach with the ocean, gentle waves, and light blue sky in the background. The text, Life, is written in see through outline letters to view the ocean through the letters.
If you are still looking, do check out more notebook journals along with affirmation pens in the collection below. All links within this post go to my CherylsArt store on Zazzle, a third party, print on demand company. I created the designs on these covers and earn income from qualifying purchases. Zazzle does the printing and shipping.
Cheryl Paton
CherylsArt shares family friendly designs printed on tshirts, mugs, stationery, and more. Most of these products are from my CherylsArt store on Zazzle. https://www.zazzle.com/store/CherylsArt. Find my coloring books, scrapbook paper books, notebooks and more, on my author page on Amazon. https://www.amazon.com/author/cherylpaton.
Tuesday, November 22, 2022
Thursday, September 22, 2022
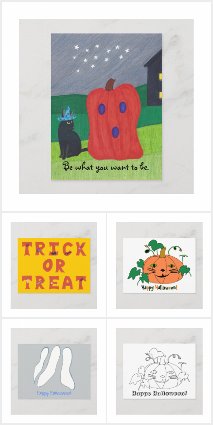
Cute Halloween Cards and Postcards
Welcome. You have found a cute collection of Halloween cards and postcards, that you can also customize.
You don't have to wait or search, just jump right in on the link below; it will take you to my CherylsArt store on Zazzle:
If you'd like to read more, continue on here.
Halloween is my daughter's favorite holiday. She is in her 30's now, and Halloween is still her favorite holiday. She likes the cooler weather, and all of the costume options and Halloween decorations. She's been adding decorative ghost pillows to spruce up her decor.
When she was young, Halloween lasted much longer than one day; for whatever costume she wore, got much extended use both before and after the holiday. Playing dress up was a big theme for her. I could wake up and see a mermaid laying across the floor, every day for months after.
She and her friend would dress up in feathers and shawls and fancy dresses. They had such fun. Halloween helped to make that possible.
Speaking of Halloween joy, I will need to pick out a card just for her, because she loves Halloween so much. Here's the text link for the Halloween cards and postcards. Halloween Cards and Postcards
Have a fun day and a Happy Halloween.
Cheryl Paton
Wednesday, August 3, 2022
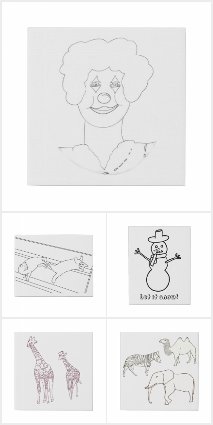
Drawings on Canvas Painting Ideas

Are you looking for a simple painting idea on canvas? Begin with a drawing that is already printed on the canvas. It can be for kids to adults.
So much time goes into the drawing, that there may be little time to really get into the painting. With a pre-printed drawing, the painting can begin, sooner, rather than later. That means more time can go into shading, color mixing, adding extra elements, etc.
The first options that I am going to show is drawings on faux wrapped canvas. I ordered my own drawing from my CherylsArt store on Zazzle, so that I could give you a first hand experience of how it went.
I used acrylic paints, from both bottles and tube paints, so that I could see how well each performed on the faux wrapped canvas. The bottle paints dried much quicker than the tube paints, so that did mean there wasn't as much time to blend colors on the canvas. The tube paints, being a thicker paint, took a bit longer to dry, which did allow more ease in blending the paint right on the canvas.
Both types of paints, overall had good coverage. Some colors are more translucent than other colors, so for instance the orange on the pumpkin took at least two coats even though that was from the thicker tube paint.
For this particular painting, I used the bottle acrylic paints on the background of grass and sky, and the yellow on the pumpkin's face. I used the thicker tube acrylic paint on the pumpkin, leaves, stem, and tree stump.
Overall, I would estimate that I had put about two hours of painting time into the painting. This time will vary upon the painter, and how detailed or not that they want to be. But overall, I would allow at least two hours for the painting time, should this be done as a birthday or other group painting activity. The good thing about this activity, is that the finished painting should be pretty dry to take home unless the painter puts the paint on really thick.
As far as other supplies, two to three brushes per painter should be sufficient, i.e. a more detail brush and a bit of a wider brush. A cup of water for rinsing the brush between colors, and paper towels for dabbing off the brush after the rinsing. And a vinyl or plastic table cloth to protect the table.
Click on the link to see the drawings that are currently available. The $20.00 range prices are for the faux wrapped canvas options. Faux wrapped canvas is a sturdy foam board option that is pre-cut with channels to aid in folding the canvas. Sticky, double sided tabs come with the board for sticking the sides together, which is done on the inside of the back. A pre-cut triangle is already cut out for hanging. The unit is lightweight, and was easy for me to maneuver while painting.
The $80.00 and up canvases are regular wrapped canvas, with actual canvas stretched, wrapped, and stabled around boards, with hanging teeth already attached.
I did the painting on regular wrapped canvas too. Both paint types, tube and bottled acrylic, took a bit longer to dry on the wrapped canvas, which allows for more blending time. So for experienced painters and for those who are more patient, I recommend the wrapped canvas. For kids and those who aren't as patient, I recommend the faux wrapped canvas.
If you have any drawing requests that you would like me to design, leave a comment below, and which type of canvas you would like it on.
Happy painting!
Cheryl Paton
Tuesday, May 31, 2022
How to make an acrylic paint skin

Making an acrylic paint skin is quite easy. The simple instructions are:
1. Pour paint onto a surface that the paint will easily peel from once the paint is dry.
2. About 1/8 inch is a good thickness for your paint pour skin.
3. Let the paint dry thoroughly.
4. Start from an edge, and gently peel the paint skin from the surface.
Those are the simple instructions, and you can get started anytime that you choose.
For a little more detail and guidance, read on:
You will need a non-stick surface that your paint can be easily peeled from. I use a baking silicone mat. I've seen others use plastic sheet dividers; the kind that are for notebooks.
It is helpful for your different colors of paint to be of the same consistency.
It is fun to experiment to create different designs and effects. Try making designs with different colors and patterns. Swirl some designs, press others, tilt and rotate others, etc.
Each paint skin has two sides! They will not necessarily look the same. You get to choose which side to use in your artistic creation. Shown below is the other side of the chameleon design that is shown above!

Which chameleon design to you prefer? Let me know in the comment section below.
Patience is key. I create my paint skins in our basement, which is relatively cool. It usually takes two to three days to dry thoroughly. It may only take two days if your paint pour is in a warmer location. If you peel to soon, and you see some of the paint sticking to the surface, gently press it back down, and give it an extra day of drying time.
Once I made my acrylic paint skin, I then created the background that I will place my paint skin on.
For this design, I wanted to create a funky chameleon. I didn't have any chameleon photos of my own, so I searched for a royalty free chameleon image. I found one that I liked, and made a donation to the creator. I used the image to easily create the shape that I wanted to use. I printed the original chameleon and cut it out; that became the template that I used on my dry acrylic paint pour.
I traced the shape onto the side that I wanted to use. I chose to trace it onto the side that I wanted to be visible so I could line my colors up better. You can also trace on the reverse side of the skin, so there won't be any visible tracing marks. I then cut out the shape with scissors.
Once you have your paint skin the way you want it, you can attach it to a surface. You can attach it to jewelry, magnets, canvases, etc. For jewelry and magnets, you can use diamond glue. For attaching your acrylic skin to canvas, you can simply use acrylic paint as the glue. Just paint it on the reverse side, press down, and let it dry. You can then add any additional details to the skin, and or your background surface.
Thanks for stopping by. If you like this page, please share it. Thank you.
Here is one of the products that I added the green chameleon to.

You can find more chameleon products by CherylsArt on Zazzle here: Chameleon by CherylsArt
Cheryl Paton
Saturday, February 26, 2022
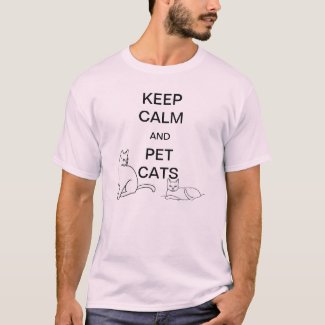
Cute Cat Shirts for Cat Lovers

Do you have the same idea as I do - Keep calm and pet cats. Cats are such great friends. They are are a purr-fect way to help stay calm. I love petting mine.
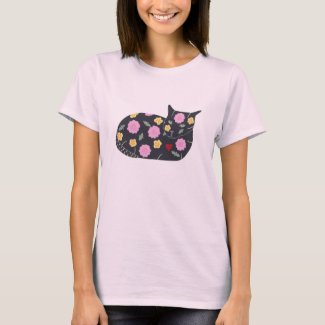
This unique cat shirt features a fun design of plants and flowers that are listed as safe for cats to eat, painted on a black cat. She makes quite the fashion statement.
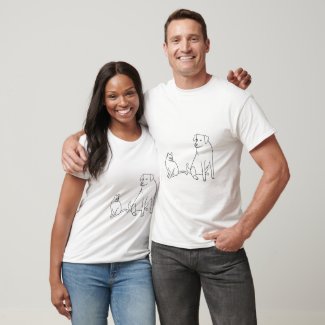
It has been said that dogs are man's best friend. Did you know that cats and dogs can also be best friends? These fun outline designs can also be a coloring/painting activity. Read more about that here.
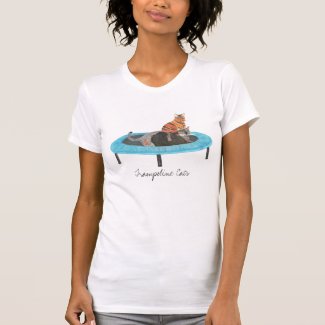
Did you know that cats are also great teachers? On this funny shirt, two cats demonstrate an awesome way to use a mini trampoline!
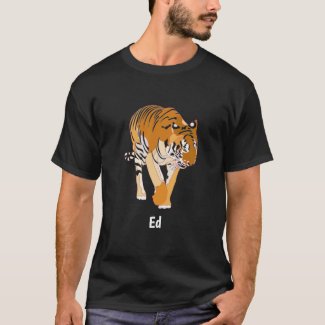
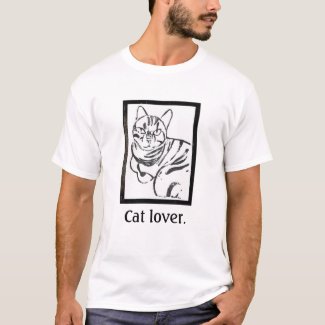
Do you like big cats too? This awesome tiger shirt can be personalized with a name or a short message.
This one is for those who like a frame around the cat. There are other color options to choose from in my CherylsArt store on Zazzle.
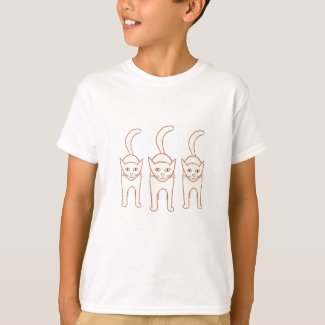
This cute cat shirt is a fun one for autumn and Halloween. Three outlines of brown cats are walking side by side, heading right towards you, on these fun shirts.
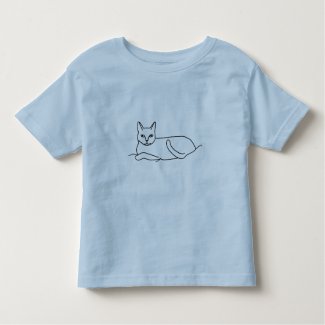
Simple and sweet is the look out this cat outline that is laying down, printed on the tshirt style and color of your choice. It's purr-fect for cat lovers of all ages.
Thank you for stopping by. Which one is your favorite?
Shop for more cat shirts at CherylsArt on Zazzle.
Cheryl Paton
Shop for more cat shirts at CherylsArt on Zazzle.
Cheryl Paton
Friday, February 25, 2022
Pause for Peace
Sometimes we need to clear our mind and take a pause from whatever we're doing and or thinking about. Sometimes we need to take a pause for peace.
I've selected a couple of videos that I have found helpful with just that. Choose the video that you feel drawn to, then watch it and listen to relaxing music as you affirm the positive affirmation - Peace everywhere.
Have a beautiful blessed day.
Your comments are welcome.
Sending thoughts of peace your way.
Cheryl Paton
Monday, February 14, 2022
The Affirmation Experiment

Welcome. Here you will find a set of three affirmations that I came up with that helped me. I hope that you find them helpful too. I am offering them to you for your own personal use. If you feel so inclined, I would also like your feedback, for which I would be grateful.
The instructions are pretty simple:
Read the affirmations first and decide if you want to do this experiment. Here they are: "I bring out and attract the good in others. I easily, happily, and kindly accept the kindnesses of others. I enjoy giving the kindnesses that I have to give." If you want to do this experiment, then you will make a commitment to yourself to do the readings for one week. (You can do them longer if you like.)
Then you will write down the affirmations on an index card (or whatever you have), read them three times a day - preferably once in the morning, once in the afternoon, and again in the evening. Also preferably out loud, and at least one time of the day - in front of a mirror.
Read them again the next day and continue on with the reading of the affirmations for seven days in a row. Then come back here and share your feedback. If you like the results after doing the experiment for seven days, then share this blog post, or the flyer below, with another/others. The specific details, along with the affirmations, follow:
Step 1. - Day 1.
Copy and write the following three affirmations on an index card. Write everything that is in the quotes.
"I bring out and attract the good in others. I easily, happily, and kindly accept the kindnesses of others. I enjoy giving the kindnesses that I have to give."
Step 2. - Commit to yourself.
Commit to yourself to repeat these affirmations for at least one full week, seven days in a row. Pause now to make your commitment, and add a comment below to add your intention.
Step 3. - Then read the affirmations several times a day, for seven days in a row.
Read the affirmations out loud, with positive feeling, at least three (3) times daily, for a full week. It can be helpful to say at least one of these times in front of a mirror. An occasional glance will suffice. If any of the affirmations doesn't seem quite true, just suspend your disbelief, perhaps read that affirmation again, and continue on.
Step 4. Honor your commitment.
Keep repeating the affirmations for at least a week, following the instructions in step 3, to honor your commitment.
Step 5. Day 8..
After you have done this affirmation experiment for one whole week, come back and share your feedback.
That's it.
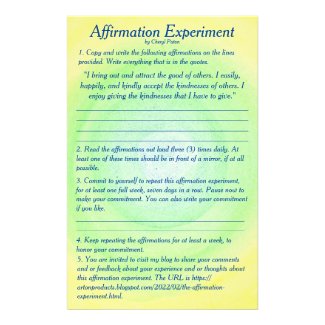
Here is a printout of the instructions that can be purchased from my CherylsArt store on Zazzle, if you would like. It is not required to do the experiment.
You can also decide if you want to continue with reading the affirmations for another week or more. Whether or not you have noticed any progress or not at first, you can still decide what you want to do. The more time that you give to any new thought, the more natural the thought can become over time.
If you have found using these affirmations helpful, then please share this blog page, and or purchase copies of the flyer below for sharing this experiment.
Thank you for your consideration and or participation. Bless you.
Cheryl Paton
Thursday, January 20, 2022
Rulers with the Alphabet for Kids

Choose from a variety of rulers in different color themes, with the alphabet, on both six and 12 inch sizes. These make a nice option for both home and or school.
This first selection features the English alphabet in lower case letters. I chose a font that depicts the letter 'a' the way that children are taught to write it; with a circle and the line.
This link shows the 6 inch rulers with the alphabet. This alphabet design fits on the 6 inch rulers with two rows of letters. The colors of the letters coordinate with the color(s) on the ruler.

The 12 inch rulers features one row of letters.
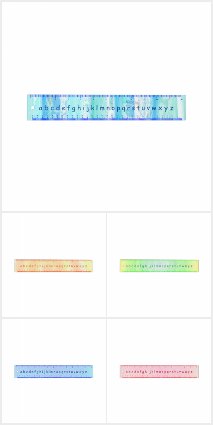
All of these rulers are made from clear acrylic and are made in the USA. The measurement markings show both inches and centimeters. The markings come in an option of eleven color choices, though you can also order these rulers without any markings if you just want to have an artistic straight edge.
Cheryl Paton
Cheryl Paton receives income on qualifying purchases made through links on this page, at no additional cost to you. Thank you.
Subscribe to:
Posts (Atom)