CherylsArt shares family friendly designs printed on tshirts, mugs, stationery, and more. Most of these products are from my CherylsArt store on Zazzle. https://www.zazzle.com/store/CherylsArt. Find my coloring books, scrapbook paper books, notebooks and more, on my author page on Amazon. https://www.amazon.com/author/cherylpaton.
Labels
- 4th of July
- Easter
- New Years
- accessories
- affirmations
- apparel
- artist
- baby
- birthday
- business
- cat lovers
- childrens books
- christmas
- coloring books
- elections
- fabric
- fathers day
- for the home
- fun and games
- graduation
- halloween
- how to
- mother's day
- school
- scrapbook paper
- shamrock
- sports
- stationery
- thanksgiving
- valentine
- wedding
- winter holidays
Showing posts with label art activity. Show all posts
Tuesday, May 31, 2022
How to make an acrylic paint skin
Making an acrylic paint skin is quite easy. The simple instructions are:
1. Pour paint onto a surface that the paint will easily peel from once the paint is dry.
2. About 1/8 inch is a good thickness for your paint pour skin.
3. Let the paint dry thoroughly.
4. Start from an edge, and gently peel the paint skin from the surface.
Those are the simple instructions, and you can get started anytime that you choose.
For a little more detail and guidance, read on:
You will need a non-stick surface that your paint can be easily peeled from. I use a baking silicone mat. I've seen others use plastic sheet dividers; the kind that are for notebooks.
It is helpful for your different colors of paint to be of the same consistency.
It is fun to experiment to create different designs and effects. Try making designs with different colors and patterns. Swirl some designs, press others, tilt and rotate others, etc.
Each paint skin has two sides! They will not necessarily look the same. You get to choose which side to use in your artistic creation. Shown below is the other side of the chameleon design that is shown above!
Which chameleon design to you prefer? Let me know in the comment section below.
Patience is key. I create my paint skins in our basement, which is relatively cool. It usually takes two to three days to dry thoroughly. It may only take two days if your paint pour is in a warmer location. If you peel to soon, and you see some of the paint sticking to the surface, gently press it back down, and give it an extra day of drying time.
Once I made my acrylic paint skin, I then created the background that I will place my paint skin on.
For this design, I wanted to create a funky chameleon. I didn't have any chameleon photos of my own, so I searched for a royalty free chameleon image. I found one that I liked, and made a donation to the creator. I used the image to easily create the shape that I wanted to use. I printed the original chameleon and cut it out; that became the template that I used on my dry acrylic paint pour.
I traced the shape onto the side that I wanted to use. I chose to trace it onto the side that I wanted to be visible so I could line my colors up better. You can also trace on the reverse side of the skin, so there won't be any visible tracing marks. I then cut out the shape with scissors.
Once you have your paint skin the way you want it, you can attach it to a surface. You can attach it to jewelry, magnets, canvases, etc. For jewelry and magnets, you can use diamond glue. For attaching your acrylic skin to canvas, you can simply use acrylic paint as the glue. Just paint it on the reverse side, press down, and let it dry. You can then add any additional details to the skin, and or your background surface.
Thanks for stopping by. If you like this page, please share it. Thank you.
Here is one of the products that I added the green chameleon to.
You can find more chameleon products by CherylsArt on Zazzle here: Chameleon by CherylsArt
Cheryl Paton
Labels:
acrylic paint skins,
art activity,
art instruction,
cheryl paton,
how to,
how to make acrylic paint skins,
how to make an acrylic paint skin,
making acrylic paint skins,
making an acrylic paint skin
Thursday, January 8, 2015
Outline Drawings on Aprons
Here you will find a selection of simple outline drawings on custom aprons. The aprons can be worn as they are, or if you are creatively inclined, the designs can be painted, colored in.
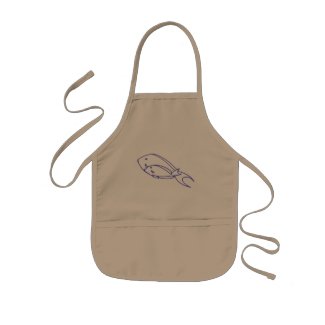
This first design features an outline drawing of a mother and baby fish swimming next to each other. It can be a great gift from a child to their mom on Mother's Day. The child could color it in ahead of time, or both mother and child can color it in together!
Here is an example of the fish design that I traced with dimensional paint. I also drew in some coral and seaweed outlines with the paint. I had purchased the design on a white apron.
The aprons come in three styles and three color choices. The styles include children's aprons, and two different lengths for the adult aprons. Any design can be ordered on any style apron.
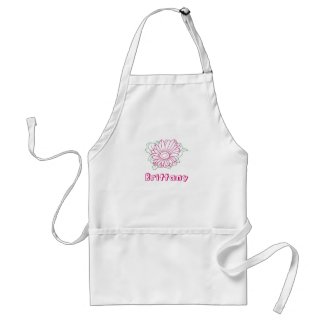
The fuchsia flower apron for adults is shown here in the medium length option on yellow. Teens through adults can also enjoy some coloring fun. It also has a template form for personalizing with a name.
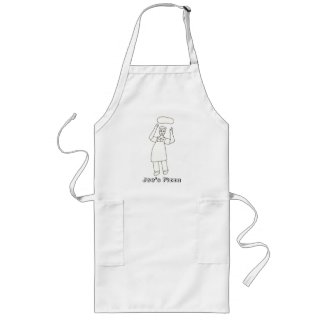
The Chef Pizza Toss apron is shown in the long length on white. Do you know a pizza chef that could use a special apron?
I own several of the aprons from Zazzle, and they have all been well made. The fabric is a medium weight cotton which is made of 65% polyester and 35% cotton. They wash up quite well in the laundry and do not need ironing.
The strap around the neck on the adult aprons has an adjustment buckle on it. The straps around the waist are quite long; there is enough room for me to bring it around and tie it in the front. I wear a size 10 in misses.
You can view more outline aprons by CherylsArt at Zazzle.
Cheryl Paton
Cheryl Paton is the artist of the above designs printed on the aprons. She earns income on qualifying purchases at no additional cost to the purchasers.
This first design features an outline drawing of a mother and baby fish swimming next to each other. It can be a great gift from a child to their mom on Mother's Day. The child could color it in ahead of time, or both mother and child can color it in together!
Here is an example of the fish design that I traced with dimensional paint. I also drew in some coral and seaweed outlines with the paint. I had purchased the design on a white apron.
The aprons come in three styles and three color choices. The styles include children's aprons, and two different lengths for the adult aprons. Any design can be ordered on any style apron.
The fuchsia flower apron for adults is shown here in the medium length option on yellow. Teens through adults can also enjoy some coloring fun. It also has a template form for personalizing with a name.
The Chef Pizza Toss apron is shown in the long length on white. Do you know a pizza chef that could use a special apron?
I own several of the aprons from Zazzle, and they have all been well made. The fabric is a medium weight cotton which is made of 65% polyester and 35% cotton. They wash up quite well in the laundry and do not need ironing.
The strap around the neck on the adult aprons has an adjustment buckle on it. The straps around the waist are quite long; there is enough room for me to bring it around and tie it in the front. I wear a size 10 in misses.
You can view more outline aprons by CherylsArt at Zazzle.
Cheryl Paton
Cheryl Paton is the artist of the above designs printed on the aprons. She earns income on qualifying purchases at no additional cost to the purchasers.
Labels:
adult aprons,
aprons,
art activity,
bib aprons,
cheryl paton,
cherylsart,
children aprons,
drawings on aprons,
for the home,
kids aprons,
outline aprons,
painting activity
Subscribe to:
Posts (Atom)