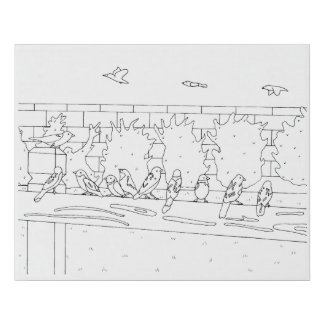
Here you will find a couple of different options to paint birds on a rail, from a drawing that I did.
I made the drawing from a photo that I took of a group of sparrows that had gathered on my back deck rail. I was amazed to see so many in a group. One bird was sitting on the post and looked to be talking to the birds sitting on the rail; so cute.
This first painting option is printed on faux canvas. It comes flat, with indented creases to be folded to make a box like shape. A notch is already cut out for hanging. It is lightweight. I recommend this option for beginners, and or kids. The paint seems to dry quicker on this material, which can be helpful if there are hands and arms that might end up resting on the paint. However, it does wash off of skin easily with soap and water.
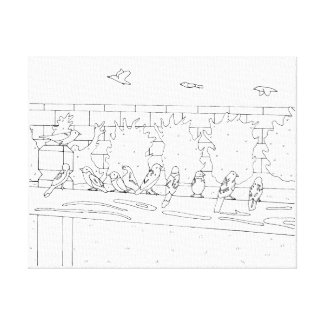
This next option is printed on wrapped canvas. It is heavier and sturdier than the faux canvas, and is meant to last long term. I recommend this option for more serious painters. With this surface, there is more blending time when using acrylic paint, as compared to the faux canvas.
The drawing is the same on both canvases.
Here is the finished painting that I did on the wrapped canvas; I decided to make the sparrows colorful!
I used two types of acrylic paint on this painting. I used bottled acrylics (liquid acrylic paint) for the background. I used acrylic paint in tubes (full bodied acrylic paint) for the birds. The full bodied acrylic paint has better coverage, and was also much brighter than the liquid acrylics. I don't know if that was just a brand difference though. I did use Americana paint for the liquid paint, and Liquitex for the full bodied paint.
If you paint this picture, let me know what kind of paint you use, and your thoughts in the comment section below.
Happy painting!
Cheryl Paton

So much time goes into the drawing, that there may be little time to really get into the painting. With a pre-printed drawing, the painting can begin, sooner, rather than later. That means more time can go into shading, color mixing, adding extra elements, etc.
The first options that I am going to show is drawings on faux wrapped canvas. I ordered my own drawing from my CherylsArt store on Zazzle, so that I could give you a first hand experience of how it went.
I used acrylic paints, from both bottles and tube paints, so that I could see how well each performed on the faux wrapped canvas. The bottle paints dried much quicker than the tube paints, so that did mean there wasn't as much time to blend colors on the canvas. The tube paints, being a thicker paint, took a bit longer to dry, which did allow more ease in blending the paint right on the canvas.
Both types of paints, overall had good coverage. Some colors are more translucent than other colors, so for instance the orange on the pumpkin took at least two coats even though that was from the thicker tube paint.
For this particular painting, I used the bottle acrylic paints on the background of grass and sky, and the yellow on the pumpkin's face. I used the thicker tube acrylic paint on the pumpkin, leaves, stem, and tree stump.
Overall, I would estimate that I had put about two hours of painting time into the painting. This time will vary upon the painter, and how detailed or not that they want to be. But overall, I would allow at least two hours for the painting time, should this be done as a birthday or other group painting activity. The good thing about this activity, is that the finished painting should be pretty dry to take home unless the painter puts the paint on really thick.
As far as other supplies, two to three brushes per painter should be sufficient, i.e. a more detail brush and a bit of a wider brush. A cup of water for rinsing the brush between colors, and paper towels for dabbing off the brush after the rinsing. And a vinyl or plastic table cloth to protect the table.
Click on the link to see the drawings that are currently available. The $20.00 range prices are for the faux wrapped canvas options. Faux wrapped canvas is a sturdy foam board option that is pre-cut with channels to aid in folding the canvas. Sticky, double sided tabs come with the board for sticking the sides together, which is done on the inside of the back. A pre-cut triangle is already cut out for hanging. The unit is lightweight, and was easy for me to maneuver while painting.
The $80.00 and up canvases are regular wrapped canvas, with actual canvas stretched, wrapped, and stabled around boards, with hanging teeth already attached.
Once I do the other painting on the regular wrapped canvas, I will update this page with my painting experience on that.
If you have any drawing requests that you would like me to design, leave a comment below, and which type of canvas you would like it on.
Happy painting!
Cheryl Paton
Mosaics, by nature, refer to stones, tiles, etc., that have been cut apart, and then mortared together to achieve a picture. Although artists of various kinds can also make mosaics that don't require stones. One of the techniques to use is paint. Here I'll share with you four different ways that you can create a mosaic painting. Each one has their own unique look.
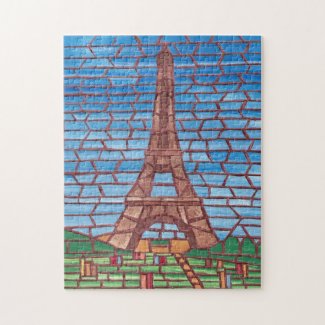
In this first technique, I painted my "stones" by painting variegated colors on sheets of canvas. You can use a variety of colors, and give them different colors, blends, and/or textures to find the look that you are going for. I then drew my design on a new sheet of canvas, cut my "stones" apart with scissors, from the painted canvases. Then I glued them in place to make my Eiffel Tower design.
Here it is pictured on jigsaw puzzles for some added fun.
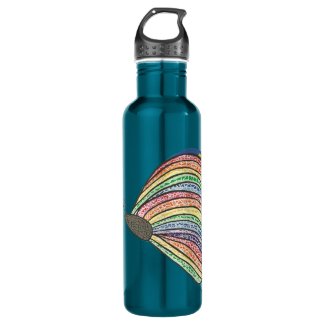
With this next design, I started with an initial butterfly drawing, and painted in strips of color on the wings, I painted a darker color on the body. I then applied a crackle medium for acrylic paints. After it is applied, the paint will start to separate and little lines will appear - making the paint look like it is breaking apart. That is the beginning of the mosaic look here.
I then went in and painted the cracked areas of the body, with black.
I added a lighter mortar colored paint to outline the colors on the wings. Here it is printed on stainless steel water bottles. You can choose from a variety of colors for the bottle.
In many mosaics, the glass has a see through or translucent look.
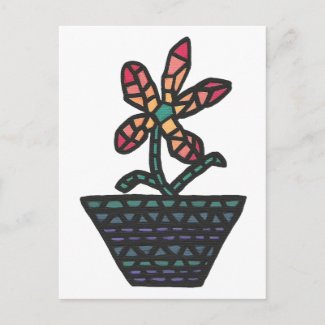
In this flower painting that I did, I used a floating medium for acrylic paints to achieve a translucent look. It is a clear gel like liquid, that helps acrylic paint to look like water colors. You can also use extenders and blending mediums, but I prefer the thickness of the floating medium for this technique.
You can mix it directly into the paint, or as I did in this painting, apply it directly to the canvas first, and then add apply the paint on top of it, while both are still wet.
Once I got my "cut tiles" filled in, I outlined the pieces in black. Here it is printed on postcards.
The first mosaic painting that I did was one of gem stones.
I started by drawing circles on my canvas. That was going to give me the background for arranging the "gem stones."
There was no crackle medium or floating medium used in this painting. All the shading and highlights were done simply by blending the acrylic paint directly on the canvas.
In this mosaic painting, the "tiles" do not fill in the whole area. Also, I made some of the stones round, which would normally be kind of hard, if someone were cutting out actual tile. However, mosaics can be made from a variety of mediums, including round stones and pebbles.
Once I completed this painting, I varnished the black area with a matte varnish, and the stones with a gloss varnish, for an enhanced effect.
Here it is printed on stickers.
Which is your favorite mosaic look? Which mosaic technique would you like to try?
Cheryl Paton
Here you will find a selection of simple outline drawings on custom aprons. The aprons can be worn as they are, or if you are creatively inclined, the designs can be painted, colored in.
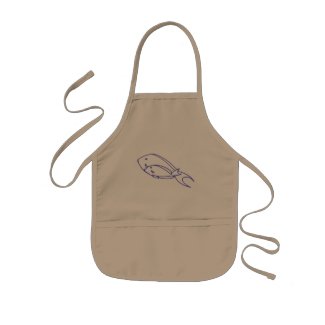
This first design features an outline drawing of a mother and baby fish swimming next to each other. It can be a great gift from a child to their mom on Mother's Day. The child could color it in ahead of time, or both mother and child can color it in together!
Here is an example of the fish design that I traced with dimensional paint. I also drew in some coral and seaweed outlines with the paint. I had purchased the design on a white apron.
The aprons come in three styles and three color choices. The styles include children's aprons, and two different lengths for the adult aprons. Any design can be ordered on any style apron.
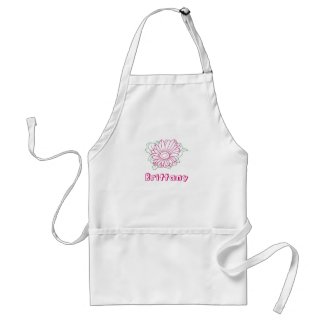
The fuchsia flower apron for adults is shown here in the medium length option on yellow. Teens through adults can also enjoy some coloring fun. It also has a template form for personalizing with a name.
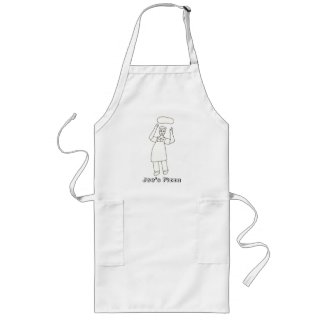
The Chef Pizza Toss apron is shown in the long length on white. Do you know a pizza chef that could use a special apron?
I own several of the aprons from Zazzle, and they have all been well made. The fabric is a medium weight cotton which is made of 65% polyester and 35% cotton. They wash up quite well in the laundry and do not need ironing.
The strap around the neck on the adult aprons has an adjustment buckle on it. The straps around the waist are quite long; there is enough room for me to bring it around and tie it in the front. I wear a size 10 in misses.
You can view more outline aprons by CherylsArt at Zazzle.
Cheryl Paton
Cheryl Paton is the artist of the above designs printed on the aprons. She earns income on qualifying purchases at no additional cost to the purchasers.
Are you looking for a fun activity for the kids to do at a party and/or as a family activity? Aprons to color in can be your answer. The kids will have an apron to help protect their clothing for future projects, and also have something that they have added their own artistic flare to.
When I was a kid, I loved creating art, and I also wanted my art to serve some kind of purpose. I liked seeing my artwork being appreciated and also used in some way. I used to make pin cushions out of walnut shell halves. How about your kids? I am sure that they would like to see their artwork on actual items.

You can also use fabric paint, and/or fabric painting medium mixed in with acrylic paints, along with paint brushes. For quicker drying time, just paint on a thin layer of paint on the fabric.

Preparation Tip
Whatever painting medium you use, do have flat sheets of cardboard on hand to place under the apron, before having the painting to begin. This will prevent paint bleed through onto the table or onto anything else that might be under the apron.
Also, be sure to have the painting activity occur early on during your get together, so that the paint can be drying while the kids are snacking or playing games.
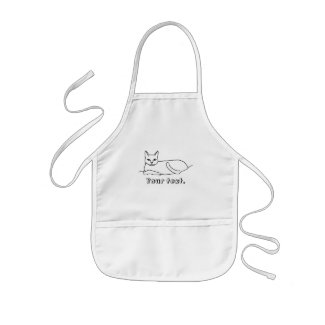
This is the cat apron before any paint is added to it. You can order with your own text, or just delete the text if you don't want any.
The kids aprons are smaller and come in the style that is pictured above. There are also adult sized aprons for older kids that come in medium and long lengths. All three styles come in a choice of white, khaki, and yellow.
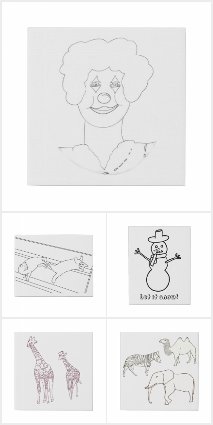
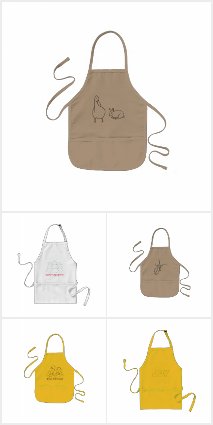
When buying, choose the outline design that you like first, then choose your apron style and/or color. These are additional outline drawings that I have already drawn:
If you have any questions and/or design requests, you can submit them in the comment section below.
Cheryl Paton