CherylsArt shares family friendly designs printed on tshirts, mugs, stationery, and more. Most of these products are from my CherylsArt store on Zazzle.
https://www.zazzle.com/store/CherylsArt.
Find my coloring books, scrapbook paper books, notebooks and more, on my author page on Amazon. https://www.amazon.com/author/cherylpaton.
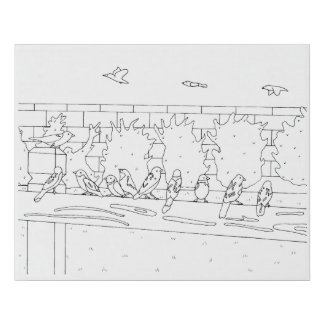
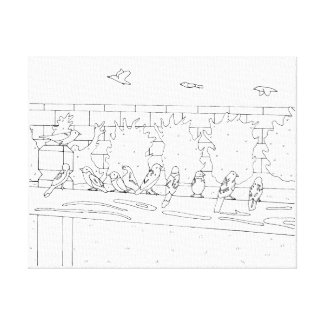
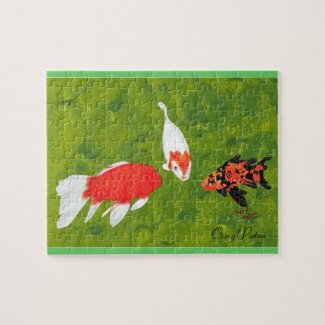
Here you will find a couple of different options to paint birds on a rail, from a drawing that I did.
I made the drawing from a photo that I took of a group of sparrows that had gathered on my back deck rail. I was amazed to see so many in a group. One bird was sitting on the post and looked to be talking to the birds sitting on the rail; so cute.
This first painting option is printed on faux canvas. It comes flat, with indented creases to be folded to make a box like shape. A notch is already cut out for hanging. It is lightweight. I recommend this option for beginners, and or kids. The paint seems to dry quicker on this material, which can be helpful if there are hands and arms that might end up resting on the paint. However, it does wash off of skin easily with soap and water.
This next option is printed on wrapped canvas. It is heavier and sturdier than the faux canvas, and is meant to last long term. I recommend this option for more serious painters. With this surface, there is more blending time when using acrylic paint, as compared to the faux canvas.
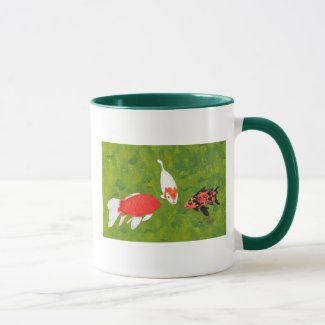
Here is the finished painting that I did on the wrapped canvas; I decided to make the sparrows colorful!
I used two types of acrylic paint on this painting. I used bottled acrylics (liquid acrylic paint) for the background. I used acrylic paint in tubes (full bodied acrylic paint) for the birds. The full bodied acrylic paint has better coverage, and was also much brighter than the liquid acrylics. I don't know if that was just a brand difference though. I did use Americana paint for the liquid paint, and Liquitex for the full bodied paint.
If you paint this picture, let me know what kind of paint you use, and your thoughts in the comment section below.
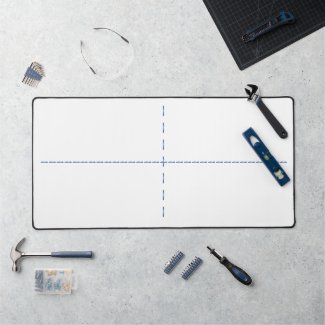
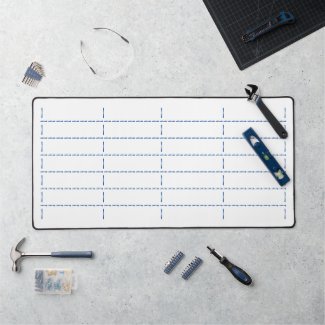
Here you have found desk mats that can be used for various sorting activities.
The activities can be for fun, learning, and or just because you want a cushioned surface to sort on.
Each desk mat is 31.5 x 15.5 inches. They are 3mm thick, and have a neoprene material with a polyester top. They have an anti-slip backing, which reduces slipping and sliding on most surfaces. They also have a durable hemmed edge.
The larger rectangle space can be a fun sorting surface for kids learning about sorting. They can sort larger objects, and simply have more space to spread the smaller items out.
Kids can learn to sort by color; all of the shades of blue can go here, all the shades of orange can go there, and so on. Buttons can be sorted by color, size, and or number of holes in each button. Buttons can also be sorted by style and shape. What other items might you sort with your kids?
The smaller rectangles can be used for sorting more buttons, etc., and also units for a building project, whether they are for kids and or adults. All the like items can go together; screws, nuts and bolts, small wood pieces, etc.
My adult daughter had purchased a variety of pieces of furniture that needed to be assembled. A mat like this would have come in handy. The floor would have been shielded from sharp edges. The padded surface would also have made it easier to pick up the individual items.
The desk mat with the smallest rectangles are for the serious sorter. Crafters who want a pad for beads (that don't roll around), sequins, larger assortment of buttons, etc. Assemblers who want a padded surface for their washers, screws, small dow rods, etc.
What will you be using a sorting mat for? Which mat or mats will best serve your purposes?
Each link above will take you to my CherylsArt store on Zazzle. Zazzle has a 100% promise. If you are not satisfied for any reason with any qualified* product you purchase, you may return your purchase for a replacement, credit or refund until within 30 days of receipt.
Order the mat or mats that you desire, with ease, through any of the links above.
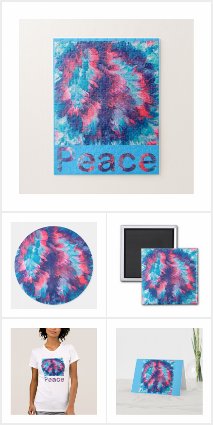
Check out the various products that this pretty wind blown peace sign is on.
The peace sign is shades of pink, blue, and purple. The background is shades of light blue, white, pink, and lavender.
I made the peace sign from a pour and press method. I poured the paint in the desired colors to make the peace sign. I filled in the background with the other colors; all on bubble wrap. I then pressed my canvas into the poured paint, and then lifted the canvas up. What I got was a windblown look of the peace sign.
Here you can find this pretty design on puzzles, tshirts, magnets, stickers, aprons, pin on buttons, greeting cards, and more.
The puzzles can be ordered in a variety of sizes, with 30 oversized pieces for children, to a challenging 1014 pieces for teens and adults.
The tshirts come in a variety of styles for children to adults.
The magnets come in a choice of square and round.
The stickers come in a choice of a variety of shapes. Some shapes display the design better than others.
Check them out in my CherylsArt store on Zazzle, here:
Looking for a simple painting idea on canvas? Begin with a drawing that is already printed on the canvas. It can be for kids to adults.
So much time goes into the drawing, that there may be little time to really get into the painting. With a pre-printed drawing, the painting can begin, sooner, rather than later. That means more time can go into shading, color mixing, adding extra elements, etc.
The first options that I am going to show is drawings on faux wrapped canvas. I ordered my own drawing from my CherylsArt store on Zazzle, so that I could give you a first hand experience of how it went.
I used acrylic paints, from both bottles and tube paints, so that I could see how well each performed on the faux wrapped canvas. The bottle paints dried much quicker than the tube paints, so that did mean there wasn't as much time to blend colors on the canvas. The tube paints, being a thicker paint, took a bit longer to dry, which did allow more ease in blending the paint right on the canvas.
Both types of paints, overall had good coverage. Some colors are more translucent than other colors, so for instance the orange on the pumpkin took at least two coats even though that was from the thicker tube paint.
For this particular painting, I used the bottle acrylic paints on the background of grass and sky, and the yellow on the pumpkin's face. I used the thicker tube acrylic paint on the pumpkin, leaves, stem, and tree stump.
Overall, I would estimate that I had put about two hours of painting time into the painting. This time will vary upon the painter, and how detailed or not that they want to be. But overall, I would allow at least two hours for the painting time, should this be done as a birthday or other group painting activity. The good thing about this activity, is that the finished painting should be pretty dry to take home unless the painter puts the paint on really thick.
As far as other supplies, two to three brushes per painter should be sufficient, i.e. a more detail brush and a bit of a wider brush. A cup of water for rinsing the brush between colors, and paper towels for dabbing off the brush after the rinsing. And a vinyl or plastic table cloth to protect the table.
Click on the link to see the drawings that are currently available. The $20.00 range prices are for the faux wrapped canvas options. Faux wrapped canvas is a sturdy foam board option that is pre-cut with channels to aid in folding the canvas. Sticky, double sided tabs come with the board for sticking the sides together, which is done on the inside of the back. A pre-cut triangle is already cut out for hanging. The unit is lightweight, and was easy for me to maneuver while painting.
The $80.00 and up canvases are regular wrapped canvas, with actual canvas stretched, wrapped, and stabled around boards, with hanging teeth already attached.
Kids love to create. With outline tshirts, they can let their creativity juices roll.
A Tshirts to Color Party offers coloring fun for the kids, and gives them something that they can also take home and enjoy for months and perhaps for a year or more depending on how fast they grow. The shirts can be for themselves or made for someone else as gifts. I.e. they can color in shirts for their moms for Mother's Day. They could even trace their hands for a more personal gift.
The pre-printed design is already there on these coloring shirt. The kids can color in the basic design, and they can add additional design elements to it. They can add a ball for the cat, stars around the space shuttle, a starfish or coral by the fish, etc. I have found that sometimes kids just need a basic inspiration to get their own creative juices flowing.
Wanting the short version about painting a tshirt? Read this blog: Color In Kids T-shirts Activity. For the more detailed version, continue reading below:
Here are the basic questions to consider for your party planning:
1. How many kids are you planning for? The younger the kids, the fewer there should be.
2. Do the kids like to paint? Are they experienced using paint brushes, or more so with crayons and or markers?
3. What kind of designs might they like, or is it a theme, such as dinosaurs, parrots, etc. Kids can get pretty creative with a simple design. Simple designs are best for a relatively short time period. They can always get creative and add more details on their own.
4. Can the kids easily hold a paint marker and or paint brush with little to no supervision?
5. Do you have at least one and a half to two weeks before the party date? Two is better. If so, then here we go.
Preparation and Supplies
You will need a color assortment of fabric paint and the t-shirts to color.
The kids will need old shirts to wear, or aprons, to help protect their clothing from the acrylic paint.
It is best to have some paper or plastic to help protect your table, and some paper towels for any clean ups.
Steps to take before the party.
1. Before the party, you will need to order and receive the outline art tshirts in time for the party. It is helpful to pre-wash and dry the tshirts ahead of time, without the use of fabric softener. The paint will adhere better when fabric softener is not used. If you are short on time, the shirts should still do pretty well if they aren't pre-washed. The painting/coloring will work best on white or light colored shirts. Here are designs, already printed on shirts, that you can choose from.
3. You will also need a piece of flat cardboard for each shirt, or layers of thick paper, that will be placed in between the top and back of the shirt. The cardboard needs to be large enough for the design area, plus some extra room for artistic creativity. If you don't have any boxes lying around, grocery stores are usually pretty good about helping out. You can also order cardboard cake boards; the rectangle ones are best for good coverage area in the shirt, or purchase them from a store that sells cake supplies.
4. Purchase a variety of paint colors. Fabric paint markers will be the least messy, and less supplies will be needed, i.e. brushes and water bowls.
5. You will need to provide an area for the kids to easily paint, and a place for their paintings to dry while they are playing games, snacking, etc.
Choosing the Paint
For younger children, my recommendation is fabric paint pens. These are also called fabric paint markers. They are non-toxic and are easy to handle. They can be used in a coloring motion. Tip: Aprons are a better choice for using paint markers, as the material doesn't have the stretch to it like tshirts. For techniques about painting on aprons, read my blog Outline Drawings on Aprons.
If you are using the paint pens, have some scrap paper on hand for the kids to test the paint flow and/or to get the paint flow started.
For older kids and for more blending capability, I recommend using acrylic fabric paint, along with a small variety of paint brushes.
Tips for the Day of the Party
1. Have all the supplies close by and ready to use.
2. Cover the table with paper or plastic.
3. Have an idea for an activity that the earlier arrivals can do. Ideas are word games and or singing songs.
4. Have the kids or help the kids put on their old shirts or aprons/bibs.
5. The first activity will be painting the color in (outline art) tshirts. (So the paint will have some drying time during the other party activities.)
6. Slide a piece of cardboard, centered behind the outline art drawing, in between the front and back of the tshirts. Lay each shirt flat for each child to paint. (If the children are old enough and able, they can do this step themselves. You can also do this step in advance.)
7. Let the painting begin.
a. Shake the paint markers first. Leave the lids on while shaking so that the paint tips stay intact. The kids can have fun doing the shake for this step.
b. Follow manufactures instructions for getting the paint flow to start. The ones that I use require the shaking, followed by pressing the tip on the scrap piece of paper a number of times until the paint has moved to the tip.
8. When the kids are done painting, allow the cardboards to remain in the shirts so the colors won't bleed through to the back. Leave the shirts on the table or a safe place to dry.
9. Do any other activities, games, have cake, open presents, etc. All this gets done allowing the shirts to have some drying time. If the shirts need to dry further, a hair dryer can help, before removing the cardboard.
10. Let the parents know any other manufacturer's instructions for setting the design, such as if there is any dryer time needed, the number of days to wait before laundering, etc.
11. The kids, or the person they are painting a gift for, will get to enjoy their master pieces for a long time.
Let me know if you have any party questions below. Your design request is welcome.
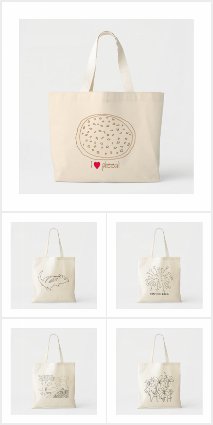
It's fun to decorate canvas bags. You can choose from a variety of options. You can paint on them, draw on them, add ribbon and/or sequins to them; and I'm sure that you'll come up with some other ideas on your own too. You can create your own complete design, and or you can fill in and add to a pre-printed design.
A simple way for both kids and adults to start, is by using a bag that already has an outline design printed on it. The design can be colored in with paint markers, painted in with various brushes, outline it with dimensional paint, etc. The artists can also glue on buttons, ribbon, and/or draw extra design elements to the original drawing.
I have found that fabric paint markers work pretty well for painting on canvas. Make sure they are made for fabric.
When using the paint markers, they may require shaking them up from time to time to mix up the paint. Be sure to put the lid back on before commencing to shaking them, as the tip may fly off. So keep those lids on when shaking so you won't have to spend time searching for that little tip. : )
You can choose from basic colors to neon and/or pearly colors.
Also, I have found the medium tipped paint markers to work better than the fine tipped ones. The paint flow works better and was more consistent with the medium tipped fabric paint markers.
Those who like more details can choose a more complex design. Some people prefer simple designs to add their own details to, and some just prefer simple all together. A simple way to paint in circles is to use a painting stylus. You can also make circular motions with the stylus to create bigger circles. Change the motion to be wider or longer in a certain area to create an oval or tear drop shape.
Here are some fun pre-printed design choices to choose from. This link will take you to my CherylsArt store on Zazzle:
Another fun way to decorate a canvas bag is by drawing your own design, using stencils, and/or with sponge painting. Although this video didn't show it, it is best to place a sheet of flat cardboard in between the fabric layers, before painting. Then leave the cardboard in place until after the paint has dried. This will help to keep the wet paint from bleeding through to the other layer of fabric and or to the table surface below the fabric.
My preferred method of drawing on blank canvas is with watercolor pencils. The paint that you add will blend in with the colors of the watercolor pencils, and any excess can be wiped away with a damp cloth once the fabric paint has completely dried. And there are no dark pencil lines to show through.
You might also like to add ribbon and other embellishments to your design. My preference for gluing items onto fabric is the Ultimate Glue. It dries clear and remains flexible. In my own experience, it has held up very well. I have used it for hemming floor cloths made from canvas.
Extra dimension can be added with dimensional paint. I recommend that the dimensional paint be used sparingly, perhaps just for outlining after the other colors have been painted in. The dimensional paint takes longer to dry and is easy to smudge if you're working around it. So it's best to save adding dimensional fabric paint until the very end.
A simple way to add drawings and/or letters is to have some stencils on hand. These can also be outlined onto the bags using watercolor pencils.
Now that you've got some painting ideas and inspiration in mind, here are some basic tips to follow:
1. Before painting, place a flat sheet of cardboard directly underneath your painting layer of fabric, to keep the paint from bleeding through to the underneath layer of fabric and/or your table top.
2. For first time painters, use the fabric paint markers, as there is less mess and more control of the paint.
3. If this is being done as an activity for a birthday or other gathering, have the artists do their paintings at the beginning of the party so that the paint can be drying while they are eating and/or enjoying other activities. Note that dimensional paint and paint that is applied thickly, can take hours to dry to the touch.
4. Once the paintings have thoroughly dried, follow the manufacturer's directions for heat setting the design (if any), to ensure longer lasting results.
Find more outline bags by CherylsArt online at zazzle.com
Does your child like to color or paint? Do they like to display their works of art? Would they like wearing their art? If you have answered yes to any of these questions, then your child or children will also probably enjoy coloring in pre-printed designs on tee shirts.
On these shirts, the designs are basic drawings, allowing your child to easily color/paint them in, and to add their own creativity to the design. They can add in background features, shading, cross marks, or add their own toppings to a pizza shirt. They can add polka dots or stripes to their creation, or added details, like
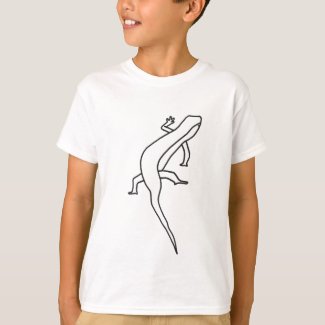
I used to host birthday parties at a local craft store, and I was rather amazed and impressed with the children's creativity when they were just given basic designs to work with. A simple outline drawing, like this lizard outline, can spark your child's imagination. No two beginning designs ever looked alike once the children were finished their creations.
I recommend using acrylic fabric paint. I recommend the fabric paint that comes in the little bottles. It is a pretty good consistency for painting with. Check the labels for any additional instructions, like heat setting the shirts after they have dried. I have mainly used the Americana paint and have had good success with it.
It is best to pre-wash the shirts first, without the use of any fabric softener, to help the paint adhere better.
If you want to try paint markers, I have used the fabric paint markers by Elmer's before, and have had good experiences with them on painting aprons. Just be sure to recap the marker when shaking the paint up, and to pre-test on a rag or sheet of paper to get used to the amount of pressure to apply, first. Also, when you need to get more paint down to the tip, apply the pressure on a scrap sheet of paper or fabric and not on the creation. I also prefer the medium tip markers; they cover a wider area, and have a more controlled paint flow.
Whichever method you use, be sure to lay a sheet of flat cardboard under the fabric that is being painted on, to protect whatever is under it, from any paint bleed through. If the item is a tee shirt, you'll want to place the flat cardboard between the two layers of fabric.
Click below to peruse my outline drawings printed on tee shirts to inspire your child's creativity.
I've painted animals before; those were done on canvases. This is the first animal that I've painted on a dimensional object.
I had purchased some rocks at the craft store because I wanted to give this type of painting a go. I thought I might paint some cats.
However, a friend of mind is hosting a Zazzle party for me, and I decided to give her a hostess gift. So then it dawned on me to paint a pet rock for her. So I called her up and asked her what her favorite animal is and she replied dogs.
Her favorite dogs are beagles and collies. So I browsed some images of beagles online and looked at my rocks, and decided yep, beagle it is.
This particular beagle was not painted to look like anyone's pet; it is actually a conglomeration of different characteristics that I saw on the beagles that came up in my search results.
It is kind of neat painting a portrait or the like on a dimensional object. I like that it has some size to it.
A week or so before the beagle painting, I tried my hand at painting lady bugs on small rocks.
Lady bugs are a nice place to start, as they are pretty straight forward to paint.
Once I painted the dog, I was glad to handle something bigger. I also liked looking through the rocks and finding a good fit for the animal, and then determining how I wanted the dog to lay. It adds a new dimension to my painting.
Whether the subject is large or small, the basic techniques are the same.
1. Draw your main image on the rock. I used a watercolor pencil, some people like using markers.
2. Paint in your base coats, and usually a second coat on top of the base coat.
3. Then do your adding. If it's basic, add some highlights and/or shading.
For the lady bugs, I highlighted the wings before adding the dots. I dabbed a lighter shade on their wings around halfway down their back, with a small round sponge.
For the dog, I added some highlights and shading before adding the fur strokes. I used side by side shades directly on a rounded brush to get a blending for the fur. Then I used the same side by side technique on the rake brush to get more of a fur look.
Once the painting was dry, I also add two coats of varnish, waiting for it dry in between. A couple of coats is probably fine, unless it might get lots of use, or be outdoors, then you might want to add more.
Have you painted any pet rocks yet? Will you be painting any? Which pet will you paint?
What do you think of my first ventures with painting pet rocks?
Cheryl Paton
Shop designs by CherylsArt at Zazzle.com.
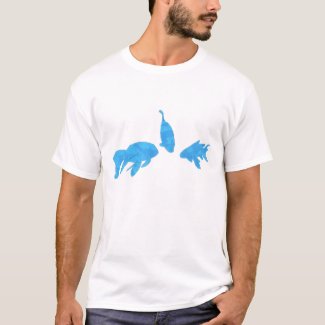
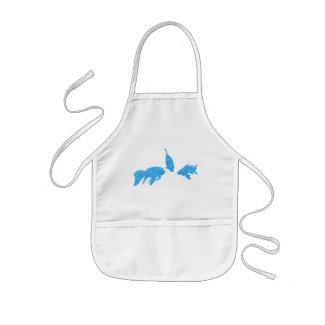
Before I had painted in the background, I had taped in the fish with blue painter's tape; they turned out pretty cool. Here this abstract school of blue fish is printed on tee shirts.
If you are a tropical fish fan or know someone who is, these two tone mugs are a perfect choice. You can choose the accent color, and or you can also choose a different mug, cup style.
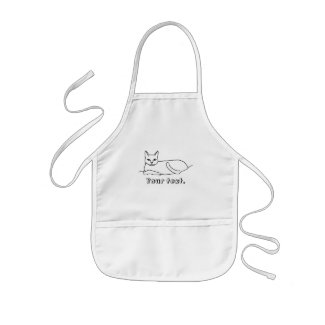
Are you looking for a fun activity for the kids to do at a party and/or as a family activity? Aprons to color in can be your answer. The kids will have an apron to help protect their clothing for future projects, and also have something that they have added their own artistic flare to.
When I was a kid, I loved creating art, and I also wanted my art to serve some kind of purpose. I liked seeing my artwork being appreciated and also used in some way. I used to make pin cushions out of walnut shell halves. How about your kids? I am sure that they would like to see their artwork on actual items.
Coloring in aprons can be less messy or more messy. It mainly depends on the kids, and also what kind of paints you choose. For more of a coloring experience, I recommend the fabric paint markers. They don't require any bowls of water or brushes. They do require a little bit of practice first, so that the kids don't press the tips too hard, and inadvertently have too much paint run out. In my experience, the Sharpie Permanent Markers have bled on the fabric when laundered, even though I had heat set the design first. So I do recommend acrylic paint markers.
You can also use fabric paint, and/or fabric painting medium mixed in with acrylic paints, along with paint brushes. For quicker drying time, just paint on a thin layer of paint on the fabric.
Dimensional paint can be used for outlining an already painted in design, or just by itself. The dimensional paint will take longer to dry; so it should be laid to the side for several hours or more before any kind of manipulation.
Preparation Tip
Whatever painting medium you use, do have flat sheets of cardboard on hand to place under the apron, before having the painting to begin. This will prevent paint bleed through onto the table or onto anything else that might be under the apron.
Also, be sure to have the painting activity occur early on during your get together, so that the paint can be drying while the kids are snacking or playing games.
This is the cat apron before any paint is added to it. You can order with your own text, or just delete the text if you don't want any.
The kids aprons are smaller and come in the style that is pictured above. There are also adult sized aprons for older kids that come in medium and long lengths. All three styles come in a choice of white, khaki, and yellow.
When buying, choose the outline design that you like first, then choose your apron style and/or color. These are additional outline drawings that I have already drawn:
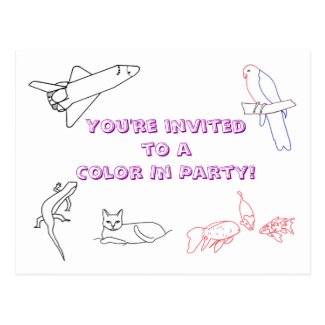
Are you looking for a coloring activity for older children that only takes up a little space?
Do you have kids that like small detail work and like lots of practice?
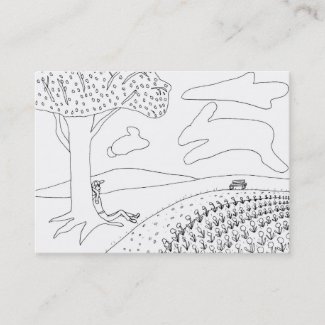
Coloring outlines on business cards is a fun choice.
Pull out some coloring business cards and colored gel pens and or fine tip markers, and let the kids color away.
These designs are printed on the business card size of your choice; the standard and chubby sizes come in packs of 100. Kids can enjoy making new colorings with these little designs. They can either keep them all to see their progress over time, make a collage, and or give them away.
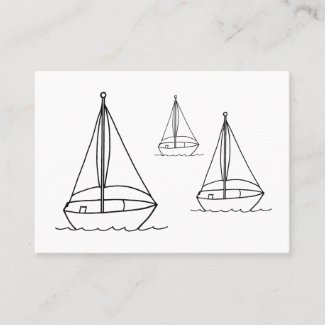
This first one is a basic and simple design of three sailboats. Younger children will enjoy their simplicity. Older children can enhance them with additional details to the boats, and add extra scenic details like the ocean, the sky, etc.
I was watching an underwater video on YouTube one day and saw a striped fish with multiple colored stripes. I had no idea that such a multi-colored fish existed. Had I seen it in an artistic picture, I would have thought that a someone had just colored it that way. So have fun. Be creative.
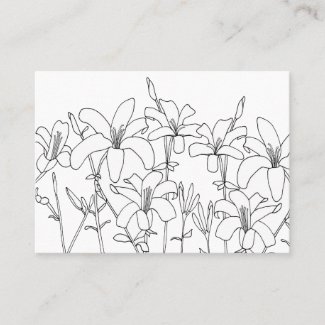
The flowers on these cards can be a different color each time, or even covered with stripes and polka dots! You and or the kids can decorate them any way.
Here is a fun design featuring a boy gazing at the shapes in the clouds. He is sitting and leaning back on a tree, near a field of flowers. I used to enjoy gazing at the clouds and imagining what all the different shapes could be. It's a fun to imagine. Do you look at the clouds and imagine? I see a rabbit leaping over the field. What do you see?
I have tested colored ink gel pens and markers on my business cards, and as long as you don't immediately wipe over the color, it adheres pretty well. However, you might want to pre-test your coloring instruments before handing them over to the kids. For best results, you can choose the matte finish on the business cards.
Check out more coloring business cards by CherylsArt at Zazzle, where you'll also find holiday themed outlines to color in.
Do let me know if you have any outline drawing requests for these coloring business cards.
Here you will find some coloring, painting options for kids, including tshirts and wrapped canvas.
If your kids want to do more than color, for their art to have some kind of purpose, consider outlines on tshirts that can be colored in with paint markers. They then get to wear their art or gift it to someone.
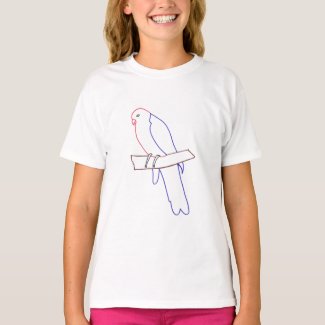
This parrot is ready for some color. What colors would your child make this parrot?
I have found that acrylic paint pens work the best for this activity. With paint pens, there is a lot less chance for paint spills. Do keep the lids on though when shaking the markers to mix the paint. The tip has been known to fly across the room when I forgot to put the lid back on. You can check out the paint pens that are rated for fabric on Amazon. Overall, there is less mess with paint pens than bottled paints.
The painting, coloring can also be done with acrylic fabric paint and paint brushes. Either way, remember to place a flat sheet of cardboard between the two layers of fabric before the painting begins. Also be sure that your table surface is protected before the painting begins. If you use brushes, I recommend a variety. It's nice having some flat edge brushes as well as ones with small tips.
Want a different outline design on tshirts? Check out more outline tshirts in my CherylsArt store on Zazzle.
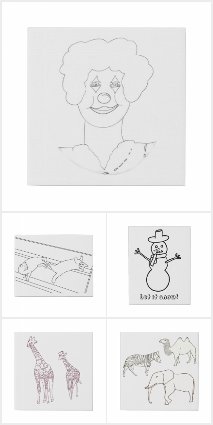
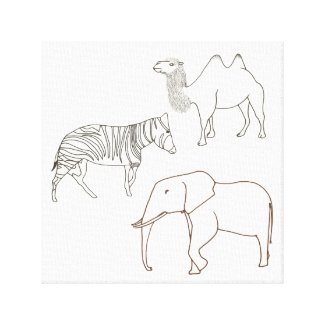
For something that can be hung afterwards, there are outline drawings on wrapped canvas. Those that are feeling more creative, they can also add their own additional details; such as grass and trees for this camel, zebra, and elephant drawing. The kids can make it be their own version of a safari!
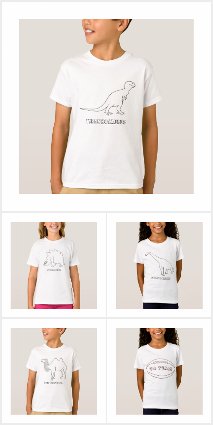
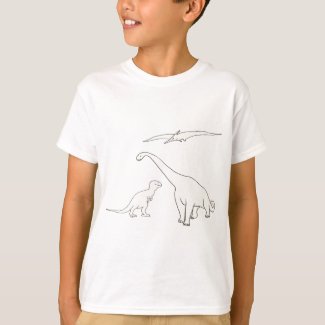
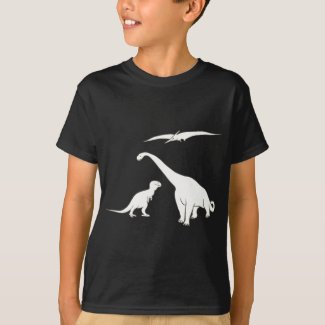
Welcome. Here you will find tshirts with outline designs of dinosaurs. They can be worn as they are, or colored in with fabric paint. If you like doing embroidery, you could even embroider the outlines.
When I was a kid, I loved coloring in the outline designs that were printed on table cloths, and I still have one of them. There are a lot more options now.
Kids love to color, and they also like to feel useful, as do adults. With these fun prehistoric dinosaur shirts, both boys and girls can get in on some coloring fun. Afterwards they will also have a shirt to be proud of that they can wear and or give as a gift.
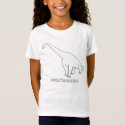
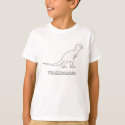
These tshirts feature three outline drawings of dinosaurs: pteranodon, tyrannosaurus, and a brontosaurus, all pictured on the same shirt. You can select the shirt style and color.
These links will take you to my CherylsArt store on Zazzle.
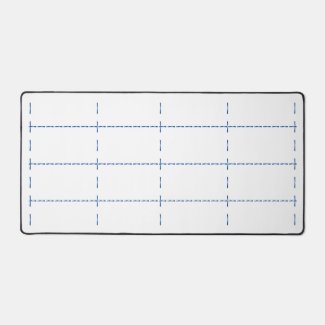
Hangman is a spelling game where one person thinks of a word or phrase and draws lines, one for each letter of the word or words. The other player or players takes turns guessing letters; the originator of the word or phrase fills in the correct letters on the drawn lines, as they are guessed, until the word or words are spelled or until someone guesses what the word or phrase is. If the called letter isn't needed in the word or words, the originator draws a body part on the poll, creating a hang man.
The game continues in this fashion until the word or words are guessed or until the stick man is filled in on the hanging poll, whichever occurs first.
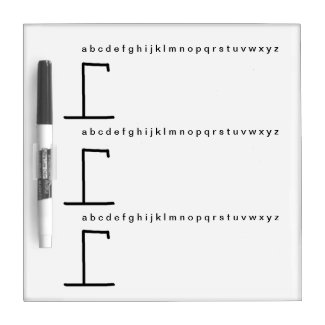
My daughter and I played this game one night and went through quite a bit of paper. So I got the idea to create the game on a dry erase board. It was not only fun, we also got to write on a hard surface, which was an added plus. It was also nice to play several games and then erase them.
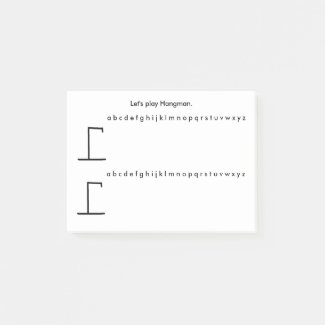
I thought it would be even more fun, to have a convenient alphabet handy. Then players can readily see which letters have already been called. The word originator draws a line through the called letter in the alphabet line, whether the letter is used in the word or words, or not.
You can order you hangman dry erase board by clicking on the link below, which will take you to my CherylsArt store on Zazzle.com.
The paper PostItNotes is also a fun and portable version. These can be carried along in a purse or tote bag; then you can easily play while waiting for your meal, etc, or just because. This size measures 4 by 3 inches and has two hangman games per page.
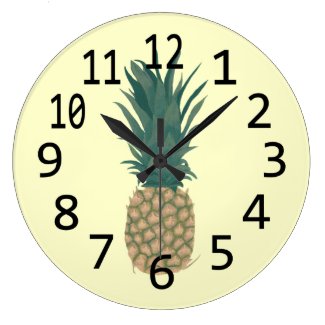
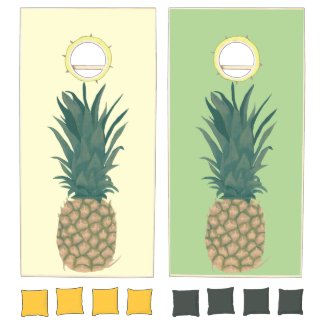
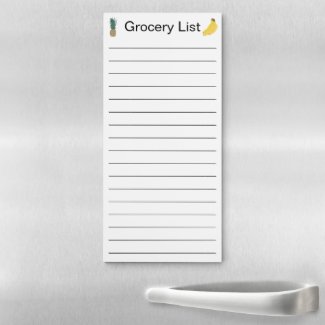
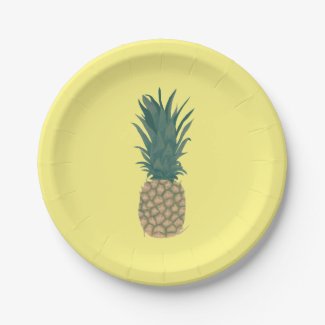
Here you will find a selection of pineapple themed products. Pictured on wall clocks, cornhole game board sets, and more, is my painting of a whole ripe pineapple.
First off is a pineapple on a pale yellow background, printed on wall clocks. You can choose the clock shape and the size if it applies. The round clock comes in a choice of two sizes, 8 x 8, and 10.75 x 10.75 inches. The larger size also comes in a square option.
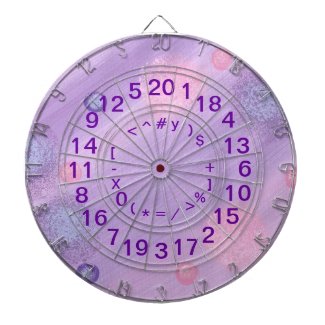
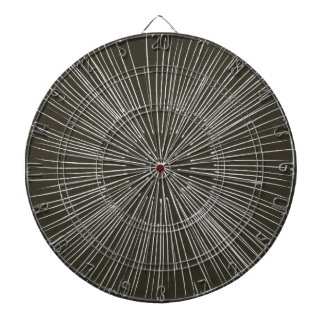
Did you ever want to play darts with some added challenge? How about playing darts where you can spell out words? If you get really good, you can spell out a sentence. No more having to aim at one particular spot in the center. The challenge is to aim for a particular spot in a particular order.
If your aim isn't quite on par with your target letter, you can spell a word starting with whatever letter you land on!
The blank spaces can be used for spaces between words. Points can be earned for spelling a word correctly, or however you want to play.
If spelling is not your game, then perhaps math is. Do you long for a creative way to practice equations? You can begin with simple equations and work your way up to more complex equations. Again, you can earn points for making a correct equation; that's if you're keeping score.
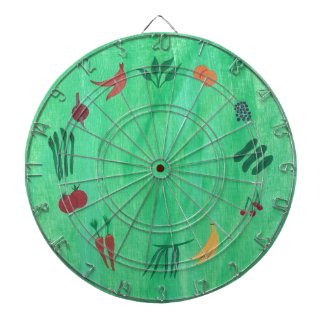
If spelling and math are not your forte, then perhaps eating healthier is. This fruit and vegetable dart board is designed for fun, and awareness to include more fruits and vegetables in your life. Enjoy. Wouldn't this be a fun way to order produce!