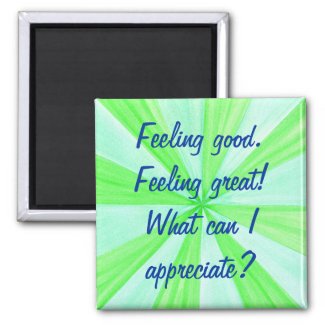
We all like to feel good, and/or better. It's such a good feeling to have when you're feeling good! Little reminders can serve to give you a boost with a refocus of mind.
There are times when I walk by and read one of my little affirmation reminders, that my mood can make a positive shift.
It also helps me when I purposely smile at myself in front of a mirror!
You may be wondering what this has to do with art. When I first started using affirmations, I found that I wanted something more. For me, it helped to have little pictures that went with the affirmation; my mind then made a quicker connection to them, and it also gave my mind an image. I liked that, and it worked for me.
If you like art, then that might work for you too.
It helps to be appreciative and/or loving. Think about a favorite experience, or when you felt loving towards someone (it can even be towards yourself.) It's nice to foster those kinds of feelings. If you can't seem to think of one, you can always create a new one. Think of something that you want to happen, and then think of how you would feel should that event happen.
Rhymes are also a good way to make a positive connection to good feelings. I make them up for myself and used to also make them up for my daughter when she was a kid:
I have said this little rhyme often, to help me think of things that I appreciate.
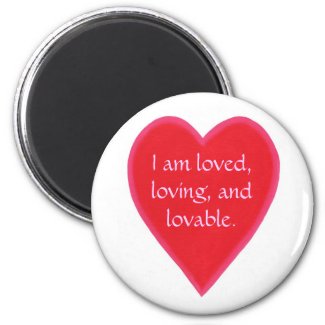
And yes you are loved. It helps when you are also loving towards yourself. Give yourself a hug, a smile; you're worth it.
Sometimes we have to remind ourselves that we are loved, loving, and lovable. And then we may need to update our minds on what loving is - such as being kind, doing something nice, giving praise or a compliment to another, and/or to yourself.
When we teach our minds what we expect loving to be, we'll be more able to recognize the love in ourselves and then we can see more of it in our lives.
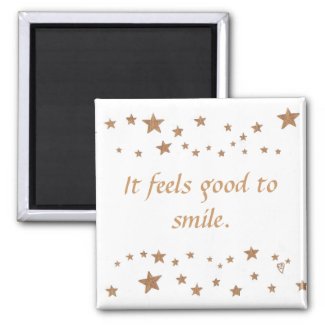
Smiling also helps. Think about something you like, or you could even just smile first. Sometimes the positive thought can also follow the positive action.
In joy.
Cheryl Paton
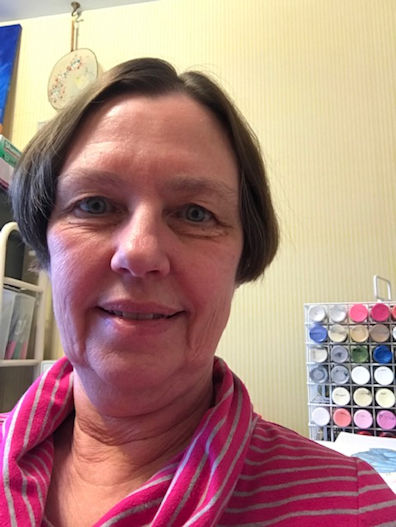
CherylsArt shares family friendly designs printed on tshirts, mugs, stationery, and more. Most of these products are from my CherylsArt store on Zazzle. https://www.zazzle.com/store/CherylsArt. Find my coloring books, scrapbook paper books, notebooks and more, on my author page on Amazon. https://www.amazon.com/author/cherylpaton.


Thursday, January 8, 2015
Outline Drawings on Aprons
Here you will find a selection of simple outline drawings on custom aprons. The aprons can be worn as they are, or if you are creatively inclined, the designs can be painted, colored in.
This first design features an outline drawing of a mother and baby fish swimming next to each other. It can be a great gift from a child to their mom on Mother's Day. The child could color it in ahead of time, or both mother and child can color it in together!
Here is an example of the fish design that I traced with dimensional paint. I also drew in some coral and seaweed outlines with the paint. I had purchased the design on a white apron.

The aprons come in three styles and three color choices. The styles include children's aprons, and two different lengths for the adult aprons. Any design can be ordered on any style apron.
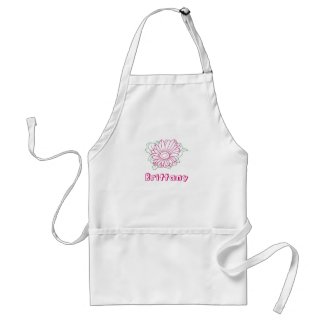
The fuchsia flower apron for adults is shown here in the medium length option on yellow. Teens through adults can also enjoy some coloring fun. It also has a template form for personalizing with a name.
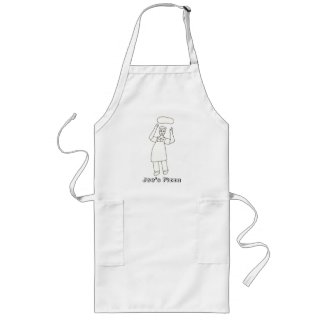
The Chef Pizza Toss apron is shown in the long length on white. Do you know a pizza chef that could use a special apron?
I own several of the aprons from Zazzle, and they have all been well made. The fabric is a medium weight cotton which is made of 65% polyester and 35% cotton. They wash up quite well in the laundry and do not need ironing.
The strap around the neck on the adult aprons has an adjustment buckle on it. The straps around the waist are quite long; there is enough room for me to bring it around and tie it in the front. I wear a size 10 in misses.
You can view more outline aprons by CherylsArt at Zazzle.
Cheryl Paton
Cheryl Paton is the artist of the above designs printed on the aprons. She earns income on qualifying purchases at no additional cost to the purchasers.
This first design features an outline drawing of a mother and baby fish swimming next to each other. It can be a great gift from a child to their mom on Mother's Day. The child could color it in ahead of time, or both mother and child can color it in together!
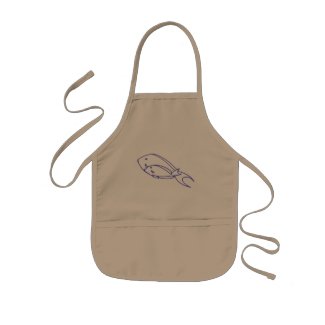
Here is an example of the fish design that I traced with dimensional paint. I also drew in some coral and seaweed outlines with the paint. I had purchased the design on a white apron.

The aprons come in three styles and three color choices. The styles include children's aprons, and two different lengths for the adult aprons. Any design can be ordered on any style apron.
The fuchsia flower apron for adults is shown here in the medium length option on yellow. Teens through adults can also enjoy some coloring fun. It also has a template form for personalizing with a name.
The Chef Pizza Toss apron is shown in the long length on white. Do you know a pizza chef that could use a special apron?
I own several of the aprons from Zazzle, and they have all been well made. The fabric is a medium weight cotton which is made of 65% polyester and 35% cotton. They wash up quite well in the laundry and do not need ironing.
The strap around the neck on the adult aprons has an adjustment buckle on it. The straps around the waist are quite long; there is enough room for me to bring it around and tie it in the front. I wear a size 10 in misses.
You can view more outline aprons by CherylsArt at Zazzle.
Cheryl Paton
Cheryl Paton is the artist of the above designs printed on the aprons. She earns income on qualifying purchases at no additional cost to the purchasers.
Wednesday, January 7, 2015
Color in Aprons - Fun Painting Activity for Kids

Are you looking for a fun activity for the kids to do at a party and/or as a family activity? Aprons to color in can be your answer. The kids will have an apron to help protect their clothing for future projects, and also have something that they have added their own artistic flare to.
When I was a kid, I loved creating art, and I also wanted my art to serve some kind of purpose. I liked seeing my artwork being appreciated and also used in some way. I used to make pin cushions out of walnut shell halves. How about your kids? I am sure that they would like to see their artwork on actual items.

Coloring in aprons can be less messy or more messy. It mainly depends on the kids, and also what kind of paints you choose. For more of a coloring experience, I recommend the fabric paint markers. They don't require any bowls of water or brushes. They do require a little bit of practice first, so that the kids don't press the tips too hard, and inadvertently have too much paint run out. In my experience, the Sharpie Permanent Markers have bled on the fabric when laundered, even though I had heat set the design first. So I do recommend acrylic paint markers.
You can also use fabric paint, and/or fabric painting medium mixed in with acrylic paints, along with paint brushes. For quicker drying time, just paint on a thin layer of paint on the fabric.

Dimensional paint can be used for outlining an already painted in design, or just by itself. The dimensional paint will take longer to dry; so it should be laid to the side for several hours or more before any kind of manipulation.
Preparation Tip
Whatever painting medium you use, do have flat sheets of cardboard on hand to place under the apron, before having the painting to begin. This will prevent paint bleed through onto the table or onto anything else that might be under the apron.
Also, be sure to have the painting activity occur early on during your get together, so that the paint can be drying while the kids are snacking or playing games.
This is the cat apron before any paint is added to it. You can order with your own text, or just delete the text if you don't want any.
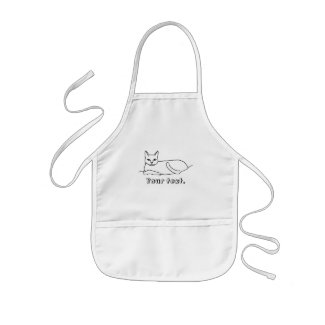
The kids aprons are smaller and come in the style that is pictured above. There are also adult sized aprons for older kids that come in medium and long lengths. All three styles come in a choice of white, khaki, and yellow.
When buying, choose the outline design that you like first, then choose your apron style and/or color. These are additional outline drawings that I have already drawn:
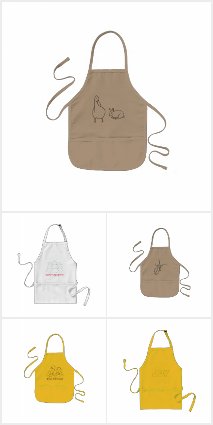
If you have any questions and/or design requests, you can submit them in the comment section below.
Cheryl Paton
Tuesday, November 25, 2014
Red Luggage Tags for Suitcases
Whether it's a gift or you are updating your own luggage, a custom personalized luggage tag can add that something extra.
These luggage tags will have the text printed right on them, so there are no little pieces of cardboard to have to insert. Everything is intact.
They are made of clear acrylic, allowing the design and text to show. The design and text can be different on each side.
The red feather design offers a soft look and has a placeholder for a monogram printed on the front. The back is pink with a placeholder for contact info.
If you like hearts and snowflakes then you're apt to like this heart snowflake design. The spokes of the snowflakes are made of little white hearts outlined in red. They're perfect for snow lovers.
For those who prefer thoughts of spring, we have the red tulips design on a black background.
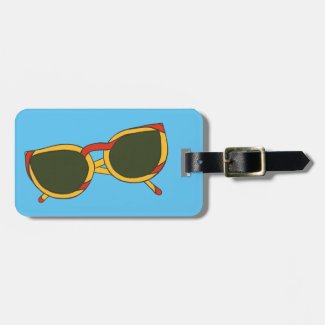
If you want to jump right ahead to summer, then the sunglasses design will be a cool look for you.
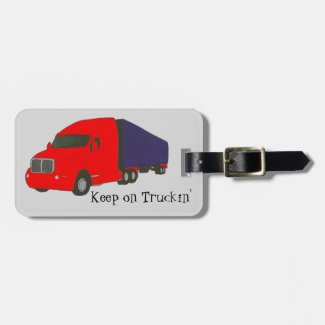
And for those who drive a truck, we have a special one for you. This luggage tag features a red and blue tractor trailer, with Keep on truckin', printed on the front.
All of the designs on the luggage tags above were created by Cheryl Paton, the designer of CherylsArt on Zazzle. They all have a template form for the back so that you can easily customize the contact info, before placing your order.
Happy traveling!
Cheryl Paton
These luggage tags will have the text printed right on them, so there are no little pieces of cardboard to have to insert. Everything is intact.
They are made of clear acrylic, allowing the design and text to show. The design and text can be different on each side.
The red feather design offers a soft look and has a placeholder for a monogram printed on the front. The back is pink with a placeholder for contact info.
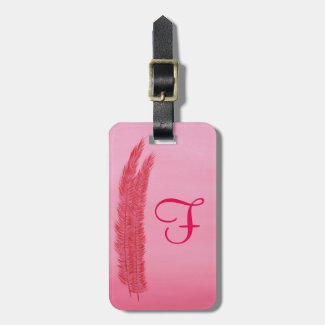
If you like hearts and snowflakes then you're apt to like this heart snowflake design. The spokes of the snowflakes are made of little white hearts outlined in red. They're perfect for snow lovers.
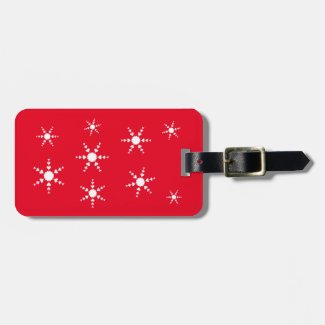
For those who prefer thoughts of spring, we have the red tulips design on a black background.
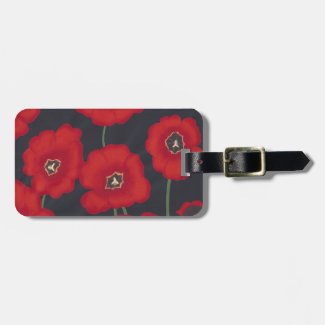
If you want to jump right ahead to summer, then the sunglasses design will be a cool look for you.
And for those who drive a truck, we have a special one for you. This luggage tag features a red and blue tractor trailer, with Keep on truckin', printed on the front.
All of the designs on the luggage tags above were created by Cheryl Paton, the designer of CherylsArt on Zazzle. They all have a template form for the back so that you can easily customize the contact info, before placing your order.
Happy traveling!
Cheryl Paton
Tuesday, November 11, 2014
My Dash Deposits
I've been reading the book, Act Like a Success Think Like a Success, by Steve Harvey. Among other things, he talks about making Dash Deposits - doing something that is a step towards your goal or vision. He challenged the reader to write down three dash deposits, and to share them with him.
So these are my three for today:
1. I am posting my artistic designs on various social media accounts.
2. I am thinking and planning for my next artistic design.
3. I am working on my current artistic design.
Thank you Steve. I'm on my way to making my dash deposits today.
What are your dash deposits for today?
Cheryl Paton
Check out my artistic designs on everyday functional products at CherylsArt on Zazzle.com.
So these are my three for today:
1. I am posting my artistic designs on various social media accounts.
2. I am thinking and planning for my next artistic design.
3. I am working on my current artistic design.
Thank you Steve. I'm on my way to making my dash deposits today.
What are your dash deposits for today?
Cheryl Paton
Check out my artistic designs on everyday functional products at CherylsArt on Zazzle.com.
Wednesday, November 5, 2014
Coloring Business Cards to Color In
Are you looking for a coloring activity for older children that only takes up a little space?
Do you have kids that like small detail work and like lots of practice?
Coloring outlines on business cards is a fun choice.
Pull out some coloring business cards and colored gel pens, fine tip markers or colored pencils, and let the kids color away.
These designs are printed on the business card size of your choice; the standard and chubby sizes come in packs of 100. I recommend the matte finish for less smearing. Kids can enjoy making new colorings with these little designs. They can either keep them all to see their progress over time, make a collage with them, and or give them away.
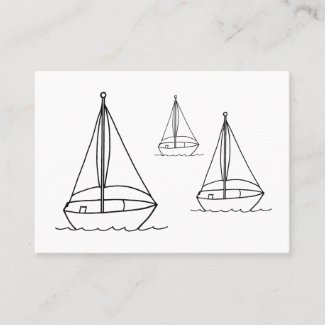
This first one is a basic and simple design of three sailboats. Younger children will enjoy their simplicity. Older children can enhance them with additional details to the boats, and add extra scenic details like the ocean, sky, birds, life preserver, etc.
I was watching an underwater video on YouTube one day and saw a striped fish with multiple colored stripes. I had no idea that such a multi-colored fish existed. Had I seen it in an artistic picture, I would have thought that a someone had just colored it that way. So have fun. Be creative.
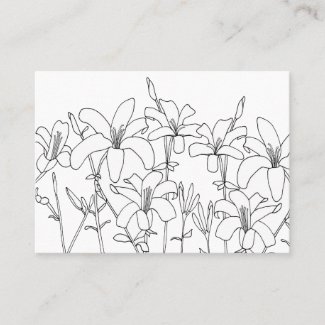
The flowers on these cards can be a different color each time, or even covered with stripes and polka dots! You and or the kids can decorate them any way.
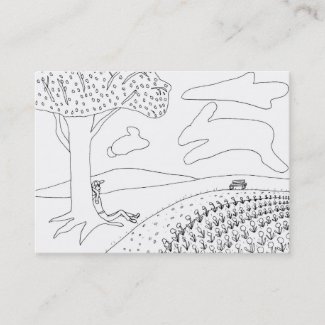
Here is a fun design featuring a boy gazing at the shapes in the clouds. He is sitting and leaning back on a tree, near a field of flowers. I used to enjoy gazing at the clouds and imagining what all the different shapes could be. It's a fun to imagine. Do you look at the clouds and imagine? I see a rabbit leaping over the field. What do you see?
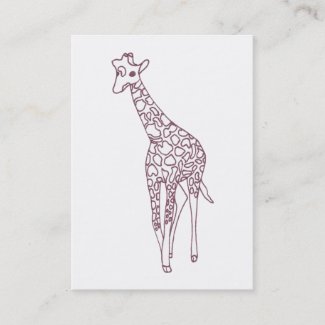
Animal lovers will appreciate the giraffe design. All the spots can be different colors, or all the same, or shaded blends.
I have tested colored ink gel pens and markers on my business cards, and as long as you don't immediately wipe over the color, it adheres pretty well. However, you might want to pre-test your coloring instruments before handing them over to the kids. For best results, you can choose the matte finish on the business cards.
Check out more coloring business cards by CherylsArt at Zazzle, where you'll also find holiday themed outlines to color in.
Do let me know if you have any outline drawing requests for these coloring business cards.
Cheryl Paton
Do you have kids that like small detail work and like lots of practice?
Coloring outlines on business cards is a fun choice.
Pull out some coloring business cards and colored gel pens, fine tip markers or colored pencils, and let the kids color away.
These designs are printed on the business card size of your choice; the standard and chubby sizes come in packs of 100. I recommend the matte finish for less smearing. Kids can enjoy making new colorings with these little designs. They can either keep them all to see their progress over time, make a collage with them, and or give them away.
This first one is a basic and simple design of three sailboats. Younger children will enjoy their simplicity. Older children can enhance them with additional details to the boats, and add extra scenic details like the ocean, sky, birds, life preserver, etc.
I was watching an underwater video on YouTube one day and saw a striped fish with multiple colored stripes. I had no idea that such a multi-colored fish existed. Had I seen it in an artistic picture, I would have thought that a someone had just colored it that way. So have fun. Be creative.
The flowers on these cards can be a different color each time, or even covered with stripes and polka dots! You and or the kids can decorate them any way.
Here is a fun design featuring a boy gazing at the shapes in the clouds. He is sitting and leaning back on a tree, near a field of flowers. I used to enjoy gazing at the clouds and imagining what all the different shapes could be. It's a fun to imagine. Do you look at the clouds and imagine? I see a rabbit leaping over the field. What do you see?
Animal lovers will appreciate the giraffe design. All the spots can be different colors, or all the same, or shaded blends.
I have tested colored ink gel pens and markers on my business cards, and as long as you don't immediately wipe over the color, it adheres pretty well. However, you might want to pre-test your coloring instruments before handing them over to the kids. For best results, you can choose the matte finish on the business cards.
Check out more coloring business cards by CherylsArt at Zazzle, where you'll also find holiday themed outlines to color in.
Do let me know if you have any outline drawing requests for these coloring business cards.
Cheryl Paton
Wednesday, October 29, 2014
Cute Tuxedo Cat Shirt with Bow Tie
Are you looking for something that is tuxedo style, yet still casual, and also fun? Look no farther, me and my cat Muffin are here to help you out.
Muffin is our black and white tuxedo cat and she has so graciously posed for the photo that I took. I then painted her cheery likeness in pointillism style, and added a red bow tie to the mix. She looks quite handsome, don't you think.
The cat design is printed on a raglan style tshirt with black sleeves, which accents Muffin's looks perfectly. You can also choose any other tshirt style and/or color of your choice.
Where will you be wearing your new tuxedo cat shirt? Feel free to share in the comment section below. I look forward to seeing where you plan to wear it.
Cheryl Paton
Muffin is our black and white tuxedo cat and she has so graciously posed for the photo that I took. I then painted her cheery likeness in pointillism style, and added a red bow tie to the mix. She looks quite handsome, don't you think.
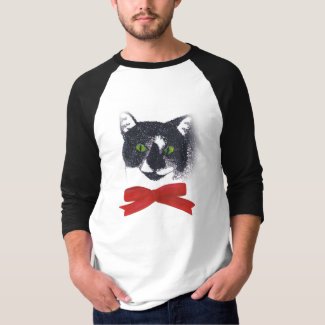
The cat design is printed on a raglan style tshirt with black sleeves, which accents Muffin's looks perfectly. You can also choose any other tshirt style and/or color of your choice.
Where will you be wearing your new tuxedo cat shirt? Feel free to share in the comment section below. I look forward to seeing where you plan to wear it.
Cheryl Paton
Monday, October 20, 2014
Pumpkin yard stake made of wood
I was looking for a wooden pumpkin yard stake so that I could add my own painterly touches to it. I found one with a pumpkin shape that I could update with my own design. The original had a covering of burlap on it and a straw bow, which I didn't need. I removed the burlap and straw, which left a furry texture remaining under the burlap.

Goo Gone (The link takes you to Amazon.)came in handy to remove the "fur." I sanded the fur off as best I could and painted the surface black to cover up the inconsistencies. The black didn't really matter, I could have used a different color. After I sanded it again, I painted it with two coats of my base color.

If you are purchasing a surface that is already pretty smooth, you may want to sand it first anyway; it will help the acrylic paint to adhere to the surface better. The rougher texture will give the acrylic something to cling to.
After the paint dried, I drew the face in using watercolor pencils and then used acrylic paint for painting the features and shading. Watercolor pencils work great; they easily blend in with the paint.
These are the colors that I used.
Pumpkin - Georgia Clay - kind of a burnt orange
Leaf - Avocado Dip
Stem - Fawn
I painted the eyes after the body of the pumpkin was completely painted.
Eyes, Nose, Mouth - Marigold - I chose a yellowish color to help it look like it was lit up on the inside. If you choose black for these features, you can add some gray highlights around the edges to add dimension.
I like using the Americana acrylic paint. It comes in convenient little bottles and has a pretty good consistency. Coverage is good with most colors. Reds can be more transparent than other colors. Covering with two layers will give the colors a more solid look.
When I did the highlights for the body, I mixed Georgia Clay paint with some of the Marigold. Then I dipped one corner of a flat brush in the Georgia Clay paint and the other corner of the brush in the mixture. Starting from the center, I painted vertical, curved stripes of the highlights, out toward the edges.
I also turned my brush around and painted the other side of the highlight using the same technique, painting the stripe towards the center of the pumpkin. This gave a more blended look on each side of the highlight.
I repeated this step for each curved section of the pumpkin that I wanted highlighted.
I did lighter highlights at the top of the pumpkin, slightly darker ones towards the middle, with no highlighting at the bottom.
How you decide to do this is up to you. Think about your pumpkins' face, where you want the light to look like it is shining on the pumpkin, and shade and highlight accordingly.
I added non-blended highlights around the bottom and sides of the mouth and eyes to give them more dimension. You can do this with a mix of Marigold with a tiny bit of Georgia Clay.
At the end, I added some fall accents to the leaves. You can dab on different colors with a paint brush or use a sea sponge. It helps to wet the sponge first, and then squeeze out the excess water before dipping it in the paint. You sponge will be more flexible then, and will also be easier to rinse out afterwards.

I hope you enjoyed this tutorial and have fun painting your own pumpkin face. It's so neat to get creative with pumpkin designs.
Cheryl Paton

Goo Gone
 (The link takes you to Amazon.)came in handy to remove the "fur." I sanded the fur off as best I could and painted the surface black to cover up the inconsistencies. The black didn't really matter, I could have used a different color. After I sanded it again, I painted it with two coats of my base color.
If you are purchasing a surface that is already pretty smooth, you may want to sand it first anyway; it will help the acrylic paint to adhere to the surface better. The rougher texture will give the acrylic something to cling to.
After the paint dried, I drew the face in using watercolor pencils and then used acrylic paint for painting the features and shading. Watercolor pencils work great; they easily blend in with the paint.
These are the colors that I used.
Pumpkin - Georgia Clay - kind of a burnt orange
Leaf - Avocado Dip
Stem - Fawn
I painted the eyes after the body of the pumpkin was completely painted.
Eyes, Nose, Mouth - Marigold - I chose a yellowish color to help it look like it was lit up on the inside. If you choose black for these features, you can add some gray highlights around the edges to add dimension.
I like using the Americana acrylic paint. It comes in convenient little bottles and has a pretty good consistency. Coverage is good with most colors. Reds can be more transparent than other colors. Covering with two layers will give the colors a more solid look.
When I did the highlights for the body, I mixed Georgia Clay paint with some of the Marigold. Then I dipped one corner of a flat brush in the Georgia Clay paint and the other corner of the brush in the mixture. Starting from the center, I painted vertical, curved stripes of the highlights, out toward the edges.
I also turned my brush around and painted the other side of the highlight using the same technique, painting the stripe towards the center of the pumpkin. This gave a more blended look on each side of the highlight.
I repeated this step for each curved section of the pumpkin that I wanted highlighted.
I did lighter highlights at the top of the pumpkin, slightly darker ones towards the middle, with no highlighting at the bottom.
How you decide to do this is up to you. Think about your pumpkins' face, where you want the light to look like it is shining on the pumpkin, and shade and highlight accordingly.
I added non-blended highlights around the bottom and sides of the mouth and eyes to give them more dimension. You can do this with a mix of Marigold with a tiny bit of Georgia Clay.
At the end, I added some fall accents to the leaves. You can dab on different colors with a paint brush or use a sea sponge. It helps to wet the sponge first, and then squeeze out the excess water before dipping it in the paint. You sponge will be more flexible then, and will also be easier to rinse out afterwards.

I hope you enjoyed this tutorial and have fun painting your own pumpkin face. It's so neat to get creative with pumpkin designs.
Cheryl Paton
Sunday, September 28, 2014
Heart Luggage Tags
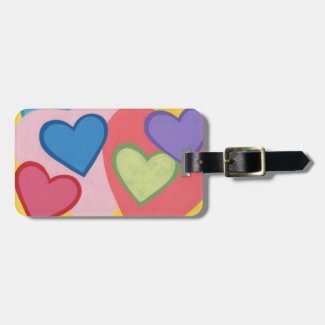
My neighbor and friend had asked me to design a colorful heart luggage tag for her. She had a heart design on her suit case and wanted a heart tag to go with it.
I invited her over to pick out the colors that she wanted on it. So the color combination that she picked is of her choosing. I did however make some colors lighter or darker, so that they could be in various shades.
This is the luggage tag that I designed for her.
I added a patch of yellow using Paint Shop Pro, to give her a place to type in her contact info on the back.
She loved the design and placed her order. Later, after she received her order, she said that she was very impressed with the luggage tags; the design was great and the tags were made of a sturdy plastic. She was very happy with them.
The tags themselves are the size of a standard business card, at 2 by 3.5 inches. They are made of durable acrylic, and are UV resistant and waterproof.
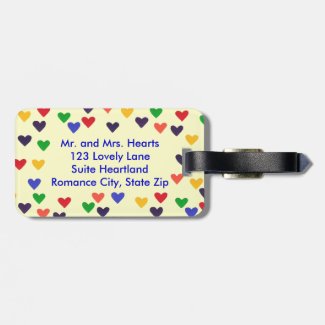
Here is a different kind of heart design that is bright and colorful too. The background color of light yellow can be customized on this one.
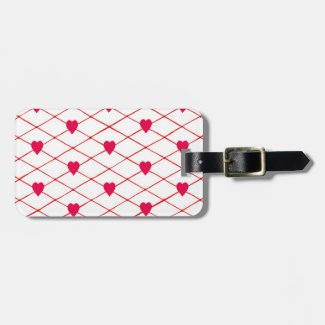
This pretty heart luggage tag has red hearts with a red criss cross line pattern, on a white background.
All three designs have a template form to easily type in your text. You will also be given the option to order your tag with a slot on one side to fill out the identification info by hand, or fill in the info online for a double sided luggage tag.
Cheryl Paton
I invited her over to pick out the colors that she wanted on it. So the color combination that she picked is of her choosing. I did however make some colors lighter or darker, so that they could be in various shades.
This is the luggage tag that I designed for her.
I added a patch of yellow using Paint Shop Pro, to give her a place to type in her contact info on the back.
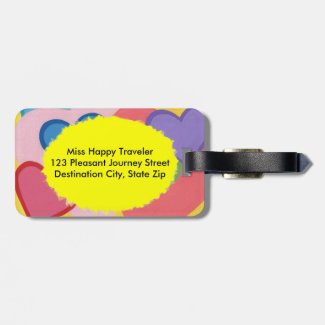
She loved the design and placed her order. Later, after she received her order, she said that she was very impressed with the luggage tags; the design was great and the tags were made of a sturdy plastic. She was very happy with them.
The tags themselves are the size of a standard business card, at 2 by 3.5 inches. They are made of durable acrylic, and are UV resistant and waterproof.
Here is a different kind of heart design that is bright and colorful too. The background color of light yellow can be customized on this one.
This pretty heart luggage tag has red hearts with a red criss cross line pattern, on a white background.
All three designs have a template form to easily type in your text. You will also be given the option to order your tag with a slot on one side to fill out the identification info by hand, or fill in the info online for a double sided luggage tag.
Cheryl Paton
Saturday, September 27, 2014
Custom Autumn Halloween Thanksgiving Paper Napkins
Here you will find autumn themed paper napkins that you can use for both Halloween and Thanksgiving.
It's a fun time of the year to add some earthy autumn colors.
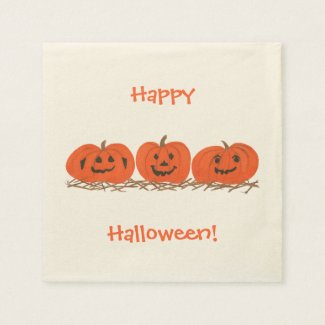
If you are planning a Halloween party, these happy pumpkins will be glad to greet your guests. I enjoyed creating these pumpkin faces; they will look so cute for your Halloween spread.
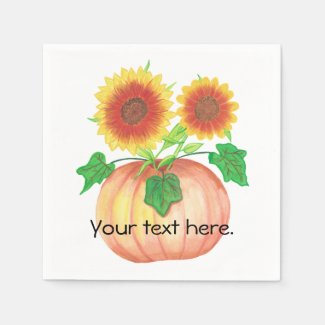
If you like the look of floral, these pretty sunflowers in a pumpkin will do the trick. I created this pastel design using watercolors. The pumpkin serves as a vase. The subtle pastel blends are a great choice for a touch of elegance.
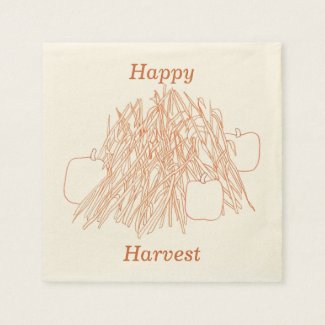
These cornstalk and pumpkins harvest napkins will be there to protect your guests' laps for any of your fall events. I created this picture by making a simple drawing and added the words, Happy Harvest. These napkins can also be easily customized with your own words. The burnt orange outlines are great for any fall event.
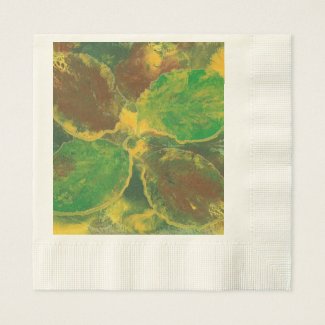
It was freeing and fun for me to paint these autumn leaves. These birch tree leaves work well for Halloween, Thanksgiving, and any other fall occasion. The yellow, green, and brown shades reflect some of the colors of the autumn landscape.
May you enjoy your autumn get-togethers. Be safe and well.
Cheryl Paton
It's a fun time of the year to add some earthy autumn colors.
If you are planning a Halloween party, these happy pumpkins will be glad to greet your guests. I enjoyed creating these pumpkin faces; they will look so cute for your Halloween spread.
If you like the look of floral, these pretty sunflowers in a pumpkin will do the trick. I created this pastel design using watercolors. The pumpkin serves as a vase. The subtle pastel blends are a great choice for a touch of elegance.
These cornstalk and pumpkins harvest napkins will be there to protect your guests' laps for any of your fall events. I created this picture by making a simple drawing and added the words, Happy Harvest. These napkins can also be easily customized with your own words. The burnt orange outlines are great for any fall event.
It was freeing and fun for me to paint these autumn leaves. These birch tree leaves work well for Halloween, Thanksgiving, and any other fall occasion. The yellow, green, and brown shades reflect some of the colors of the autumn landscape.
May you enjoy your autumn get-togethers. Be safe and well.
Cheryl Paton
Subscribe to:
Posts (Atom)