Here are some fun holiday aprons to help get in the fun spirit of Christmas. The images on the aprons are ones that I designed. They are all bib aprons, the ones that will also help to keep your tops clean.
I own a turkey apron that I have purchased at Zazzle, and I have been quite impressed with the quality. It washes up well and doesn't need any ironing. Any splatters that I have gotten on it, including spaghetti sauce, I sprayed them with some Shout and threw it in the laundry; it always came out clean. This apron is the shorter length of the adult aprons.
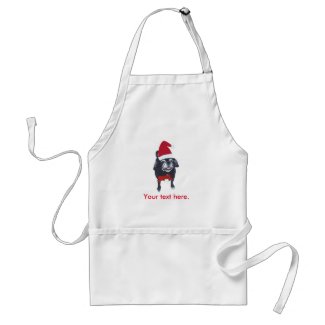
This first one is for dog lovers; it features a fun painting of a pug dog wearing a Santa hat and a red bow. She looks so happy and bright. You can easily type in a message or name to personalize your selection.
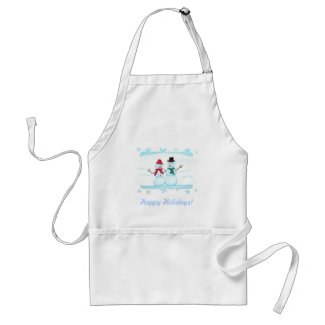
Do you like building snowmen or dream of building them? This happy snow couple is waving hi, and can help you to reminisce and/or to imagine creating your own snow creations. The text says, Happy Holidays, which can easily be customized on the template form with your own message.
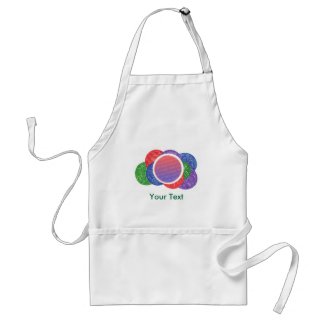
If you are looking for a fun option for sharing Christmas photos, consider placing the photo surrounded by colorful Christmas balls.
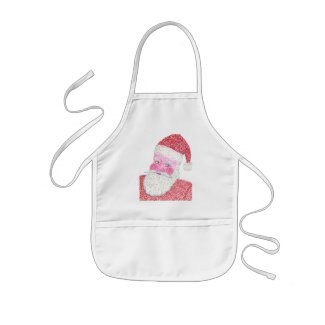
Jolly Santa Claus is also a favorite on holiday aprons. On this apron, Santa is painted in pointillism, giving him a creative textured look!
Whichever design(s) that you prefer, you can order any of the above aprons on the apron style that is shown, or you can choose a different size or color. The adult aprons come in two size choices. The standard (shorter one) is 24 long by 28 wide; it comes to just below hip level on me. The longer apron measures 30 long by 24 wide; it is longer but more narrow than the standard. The color choices are white, khaki, and yellow. The aprons are made of a 35/65 cotton-poly blend. These designs can also be order on kids' aprons, which come in one size for children.
Print all over aprons are now available. The two Santa Clauses are front and center on these inclusive aprons.
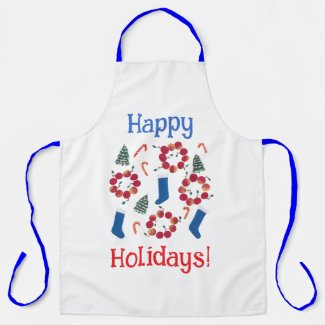
Festive holiday decorations adorn these aprons.
View more Christmas aprons by CherylsArt at Zazzle.
May you have a blessed and happy holiday season.
Cheryl Paton
The Basics
Acrylic paints are my preferred paint. The majority of colors are rated non-toxic and they are easily cleaned up with soap and water. I usually use diluted liquid hand soap or diluted laundry detergent to clean the brushes. However, as a precaution for my clothes, I do sometimes wear an apron. You can tell some of the times when I didn't. : )
Acrylic paint comes in a variety of thicknesses. Acrylic paint that comes in bottles tends to be thinner than the ones that come in tubes, but they still have some thickness. Different mediums can also be added to thin them or to thicken them and or to add texture. The texture and consistency of the paint used can affect how the paints apply and blend.
You can give acrylic paint more of a transparent look, a sparkly effect, a shiny look, and more, by using different mediums.
There are also mediums to make the paint suitable for painting on fabric. This may give it a longer life with repeated washing, but my experience has been that the acrylic paint that has ended up on my clothing has had a pretty good life time of staying set in the fabric, even with repeated washing.
Choosing your surface.
Acrylics adhere better when they have some tooth to grab hold of. So most porous surfaces work great, such a paper, canvas, wood, slate, fabric, and others.
If the surface is too smooth, sanding may help, as well as sealing the surface with an acrylic sealer. If wood hasn't already been sealed, then applying a wood sealer, for acrylics, is a good idea. Wood is normally more porous and it can soak up more of the paint and the color, if it hasn't already been sealed.
Starting a Painting
I usually start my painting with a drawing, or else a painted blended background. Sometimes I may draw the drawing on graph paper first, this gives you the freedom of easily erasing mistakes. Once the preliminary drawing is ready, I transfer that image over onto my canvas. This gives me a cleaner canvas to work with, than regular pencil marks.
When I make my drawing on canvas, I usually use watercolor pencils. The colors get blended right in to the wet paint. This can actually be used as a blending technique. Place part of your wet paint brush on the colored pencil lines to enhance the color in that area.
I like using watercolor pencils, by themselves, and also to outline letters, sketch with, etc.
Using various colors of watercolor pencils for a base drawing helps me to see the final product more easily. I use the various colors to draw in different shapes, then the outline colors are already there.
Any remaining watercolor pencil marks can easily be wiped off of most surfaces with a damp paper towel after the painting has dried.
Blending
Blending can make your painting look more realistic and shapely.
A nice blending technique for acrylic paint is applying two different colors/shades side by side on the brush at the same time. With a clean brush, go back and forth over the touching areas of color, while they are still wet, and blend. For a more gradual blend, go further into each color as you work your brush back and forth. It can also be helpful to use a blending type medium to help the paint flow better.
Here are some examples of various blending techniques. These were all done on smooth cardboard.
The first example was simply brushed on the cardboard with the paint side by side on the brush (as shown in the above photo.)
In the second example, I brushed on the lighter color, then brushed on the second color while both colors were still wet. Being on the cardboard, the paint was drying quickly, and it started to lift up the layer of previous paint as I brushed back across the surface. The paint should work better if you were painting on canvas.
In the third example, I applied Floating medium to the cardboard first, and then applied the lighter color and then the darker color. It made the colors more translucent and also easily covered a wider area.
Another blending technique is to base coat the surface first, let that dry, and then add shadings and highlights. If I want a more thorough blending affect, I re-wet the dried first coat with a second coat of that color, and then blend in my new color(s). Base coating first and letting that dry, gives a more solid look to the blending that is added. Some colors of acrylic paint are more opaque or more transparent than others. The step here will depend on the look you are wanting to achieve. For a more textured look, you may not need the extra layer of a background color.
You can also apply blending medium next to the paint on the brush. This is helpful if you're wanting to apply blending along an edge, of just one color over top the other. Experiment and see what works best for you.
Also, to get a good working of paint in your brush, go back and forth on the palette with your brush a few times, adding more paint as needed.
Watercolor Look
Acrylic paints dry pretty quickly, especially compared to oils. Extenders for acrylics can be added to increase workable time. Floating medium and glazes can also be used to give the acrylic painting more of a watercolor look. Some people also use water. If it is a short term painting that you're just playing around with, water is fine. For a more long term painting, then it's better to use a medium that will help with the longevity. Acrylic paint bought in bottles is usually thinner, and is a better choice for thinning, if you want more of a watercolor look.
For watercolor affects, you can mix the medium with the paint, or paint the medium on the surface first, and then apply the acrylic paint on top of the medium while both are still wet. Try both methods to see which one gives you the desired look that you want.
Floating medium can be placed directly on the surface, and or mixed with the paint, or placed on a side of the brush.
Placing paint on one corner of the brush and floating medium, a glaze, or varnish, on the other side, provides a nice blending technique, that fades into clear.
If you use the Floating Medium, make sure that the blended area has dried completely and even let it set for a day or so after that, if you before varnishing your finished painting.
Adding Visual Texture like Lines, Circles, etc.
I tried using a comb before, but the end teeth were longer than the teeth in between, so the middle teeth did not reach the canvas.
But you can still check around the house for other objects that will give you different textures and looks when you drag them through wet paint.
Bubble Wrap can be used to create abstract circular patterns,
Torn paper and or Painter's Tape can be used to partially cover an area or to create a rough or smooth edge.
Sponges can be used to create textures, bushes, blotchy clouds, and more.
Old tooth brushes can be used to create splatters.
Experiment
Read and experiment; come up with your own ideas.
The direction in which you hold the brush can create a different look.
Try various ones; such as:
- hold the brush perpendicular, using only the edge of the brush as you make the stroke - different shaped brushes will make different strokes
- turn and/or twist the brush as you make the stroke
- push the brush down to spread the bristles out at the beginning of the stroke and then lift the brush slightly as you finish the stroke.
These are just some to get you started. Which ones can you think of? Have fun, experiment, play.
Choosing the brush type.
Fan brushes are great for painting pine trees.
The fan brush is popular for painting pine trees. Start at the top of the tree, dabbing from side to side as you increase the amount of the brush that touches the canvas, as you go down the tree.
The fan brush comes in different sizes.
Fan brushes can be used for more than painting pine trees. You can twist and turn them for swirly effects.
Since they have a rounded brush edge, they are also great for painting clouds, the ends of flowing dresses, and more.
The size and shape of the brush makes a difference.
Different shapes and sizes of paint brushes will render different affects. Rounded edge brushes give a more rounded edge and can be great in painting billowy clouds for instance. The straight edge brush comes in handy for the straighter lines that you want, the edge of a table for instance.
An assortment in sizes as well as style is a good foundation to paint a variety of affects.
The first recommendation for acrylic paints I saw was for synthetic brushes. I've also read that for soft affects that soft hair brushes, such as sable and camel hair are good.
A tip for helping your brushes last longer is to wet them first, then squeeze the excess off with a paper towel before dipping them into the paint. And always clean them afterwards with a cool soapy water mixture until the cool rinsing water is clear. Keeping brushes clean gives them a longer life.
Painting Knives
Provides a different look - use them for mixing, scraping, and more.
With thicker paint, as in the tubes, one can also use painting knives for an impasto look; a laying down of the paint thickly. Do allow for extra drying time for this technique.
They can also be used for scraping edges or lines through wet paint already on the surface.
If you have ever watched Bob Ross, he often demonstrates the technique of placing a roll of paint along the edge of the knife tool, and then sweeping it down on the canvas to paint the side of a barn or a quick background for where waterfalls will be.
Another great use for painting knives is for mixing colors of paint together; they can work like little spoons.
Painting knives for acrylics also come in an assortment of plastic options, which also has some different applicator styles, including ones that provide scraping parallel lines through the paint for texture.
The plastic set that I have also has a round ball on one of the ends. Round balls of various sizes are also great painter tools. You can easily paint in dots for eyes, polka dots, pointillism, and more. These are known as a stylus. You can use this link to find some at Amazon, by searching for stylus in their Arts, Crafts, and Sewing category.
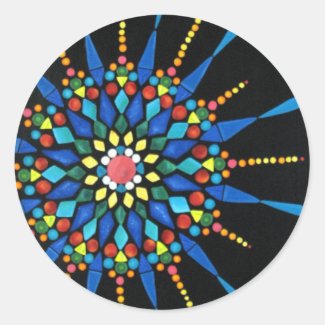
See how the colors on the Gemstone Mosaic really stand out on the bag below? Well yes the colors are bright, but I also used varnish to help achieve the effect.
I coated all of the gemstones with a glossy varnish, and coated the black background with a matte varnish, which helped the gemstones to really stand out and shine. Here it is printed on stickers. You can choose the sticker shape and on some shapes you can also choose the size.
The varnish type affects the final look of your painting.
Not only does the varnish give you a desired shine or matte look, it also unifies the painting, and provides protection for your finished artwork.
Varnishes range from matte to super glossy. They are made for interior, exterior, and also for a combination of the two. If the artwork is going to be placed outdoors and/or will be in a high humidity area, then select the exterior or combination option.
Acrylic paintings behind glass should be matted first so that the paint doesn't touch the glass. The acrylic paint can stick to the glass over time, so you want to allow the air space in between the two surfaces to protect your design.
DecoArt Varnish is my preferred choice of varnishes. It dries clear and flexible, is non-toxic; and also if I'm working on a piece that isn't to be framed, the edges still lay flat.
I used to make floor cloths from durable artist canvas. I found that some varnishes made the edges curl as it dried. This brand allowed the edges to remain flat.
Cheryl Paton
It has been said that it is important to mediate and also to mediate on God's word. What better way than to remind yourself of a favorite positive feeling prayer, than when you're ready to rest your head. It's the perfect time to put in your mind, a positive prayer. Thinking about prayer in this way can also be a form of meditation.
Sometimes the best prayer is just to give thanks. This round pillow showcases a universal multi-racial hand that represents all the races, reaching up and touching the universal hand of Love, represented as pure energy. The design and prayer are printed on both sides.
This next prayer pillow features a prayer of allegiance to God, whose real name is Love. It is displayed on a cloud like background and is printed on both sides.
See the Allegiance Pillow in pink.
Did you know that self talk is a form of prayer? Be sure to say good things to yourself.
Many sweet prayers to you.
Cheryl Paton

In addition to the birch tree rounds, you will also need some fine grain sand paper, acrylic wood sealer (for artists), artist paint brushes, your paint colors, and artist varnish.
I purchased the birch tree rounds already cut. However, they still needed sanding. After sanding, I coated the sides with the acrylic wood sealer. This raised the wood grain again a bit, so I did a second sanding to smooth it out.
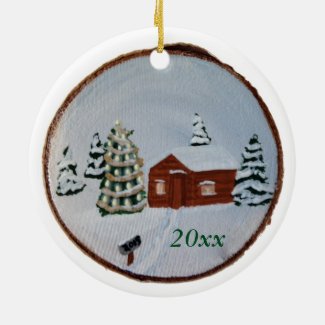
The nice thing about acrylics is that you can layer the paints, so I began with shading in the background. I was going for an evening look, so I used a little Deep Midnight Blue by Americana, mixed with white. I kept the whiter area at the bottom, and the more bluish color around half way up and towards the top.
Once that is dry, you can draw in where you would like the cabin to be. I like using watercolor pencils for my drawing, then the colors of the pencils easily blend in with the paint. If you'd like a different shape for the cabin, you can do a search on images online for cabins, to find the general style that you would like to use.
I reversed the direction of the cabin shape that I decided to use, because I wanted the cabin to sit on the right and to face towards the center.
I painted in the whole basic cabin. Once my cabin was dry, I painted in windows, the door, shading, and highlights. Once those were dry, I added in a blend of the snow colors over the door and windows.
Then you can decide where you want your trees. Paint them in with a darker shade of green and then add a lighter of shade of green while the first layer is still wet. Mix it around a bit to get different areas of light and dark. You don't need to be too exact here; snow will be covering up quite a bit of the green.
Let the trees dry, then paint in some snow on the branches. You can add the darker snow toward the deeper part of the branches and lighter snow towards the front edges.
The tree that I chose to decorate, I added lights and garland first, then a little bit of snow just on top of the garland. Most of the snow on this tree would have melted off because of the lights.
You can add a path to your door if you like. I did this by painting in white, and making it more narrow as it got closer to the door. Then add some different shades of light blue snow along the edge of the path (where is has been smoothed out and shoveled.)
You can add in a mailbox if you want. Once everything is dry, you can add a coat of artist art varnish for acrylics to help protect your painting.
I left the area to the bottom right open, so that I can sign it there (on the original), and to leave an open space for people to type in a year on my ceramic ornaments to purchase.
I used an eyelet screw that I screwed into the birch wood by hand. I did use a pair of pliers to help turn the screw. I started the screw by hand, then covered the eyelet part with a small piece of paper towel folded over, then used the pliers to turn it the rest of the way.
Here is a photo of the painted birch ornament printed on round ceramic ornaments:
Happy holidays to you.
Cheryl Paton
View more Christmas Ornaments by CherylsArt at Zazzle.
One of my favorite things to do when I was a kid was playing baseball with the neighborhood kids. We'd all end up meeting in the field that was near our house and start playing a friendly game of baseball. It didn't matter that we didn't have enough players to make two complete teams. We played ball with whoever showed up. I would have loved having such an activity for a birthday party. I'm sure other kids would love it too. Any number of players will do; it's all for fun.
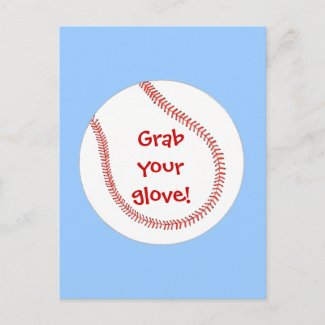
To get you started, I have designed simple baseball invitations on postcards that you can customize online. You can also delete any text that you want to write in by hand.
It's a good idea to send the invitations out two weeks before the party date.
Fresh veggies sticks will be a good idea to have as an appetizer before the game playing begins. It's quick and simple and adds some healthy snacks for game time energy.
For after the game, you can serve cupcakes or cookies; they are both easy for the kids to grab, and can be easily decorated to look like baseballs! Another great snack for after a game of baseball is watermelon.
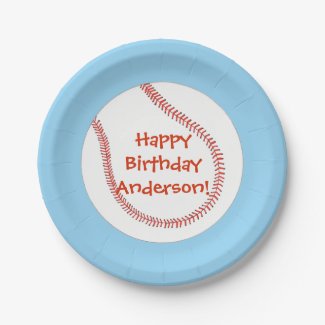
If you want paper plates for the snacks, these can also fit your party theme. The paper plates come in a choice of two sizes, 7" and 9", and a choice of square or round. The background color on any of these items can be customized with a color of your selection. I chose blue to represent the sky, and green on some items to represent grass.
You can find more matching baseball themed birthday supplies here, including napkins, ribbon, and wrapping paper:
Happy birthday game day!
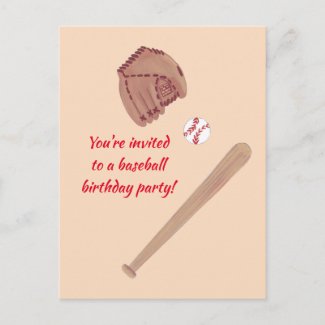
This invitation includes a baseball, the glove, and a bat in its design.
Cheryl Paton
Whether you celebrate Christmas in December and or July, it's fun to create a holiday vibe. Here are some holiday shower curtains just for that purpose.
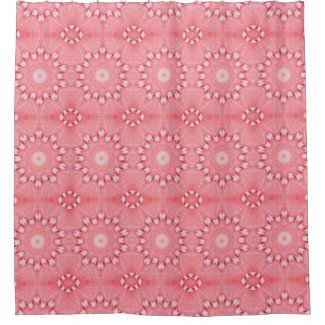
This design is from a candy cane painting turned into a kaleidoscope pattern. It's fun and festive without going over the top.
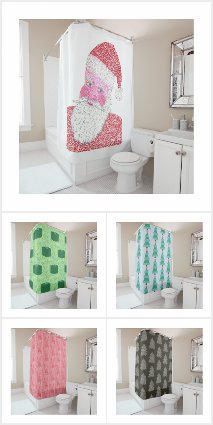
Here you'll find a even more designs, including, holly, dancing snowman, Christmas trees, candy canes, and more. Various color themes include green, purple, red, blue, and black.
The designs that you'll find on the link below were created by me, Cheryl Paton.
These shower curtains measure 71 by 71 inches and are made of 100% polyester. They have 12 stitched enforced eyelets for hanging. Liners are available to purchase as well.
Zazzle does the printing and shipping. The Zazzle promise is - We promise 100% satisfaction. If you don't absolutely love it, we'll take it back! You can check out the holiday options in the collection link above.
Cheryl Paton
I wanted to make some vegetarianand or vegan friendly invites to help fill the need for Thanksgiving invitations for this growing group.
This first one is an autumn leaves design. The word Autumn is made from my painting of colorful autumn leaves; the letters are then outlined in orange. There are leaf accents on both the front and the back. The word vegetarian can easily be changed to include vegan or to change it to vegan. This is a fine choice for a gathering that is a little more elegant.
This one conveys the feeling of fun - seeing a strutting happy turkey!
Both are easily customized on the provided template forms. Just click on your favorite design to get started.
May you have a blessed and happy Thanksgiving.
Cheryl Paton
What we think of ourselves is important. Much has been written about self talk and about being kinder to ourselves, and the positive affect that it has.
What used to be seen as being selfish, is now being seen as laying a good foundation to becoming better capable of liking and accepting yourself and others.
One way to help overcome the less kind thoughts is to smile at yourself in front of a mirror. It can simply be a smile, and or it can be included with giving yourself compliments while you're smiling at yourself.
If you haven't already, and a mirror is handy, give it a try. You can start with a smile and then look in the mirror while continuing to smile. Did you notice a difference in how you felt? Even for just a second or two?
It's worth it to do it more often than not. Do it throughout the day. Repeat it the next day. If you skip a day, no problem; just do the next day, and so on.
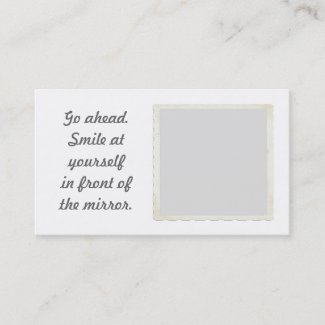
Here are some handy reminders, printed on business cards. You can place them around your apartment, house, wherever, and also to share with others.
Sometimes one may want to get away from so much thinking. Who wants to argue with all those old thoughts that come up when you give yourself that first positive thought about yourself. That compliment or affirmation may be a meager thought in this transition of change; you may have to learn to make a declaration instead, and declare the new thought as so.
I have found though that with practice, it gets easier over time.
Review:
Smile at yourself while looking in the mirror. No thoughts need to be included, although you can. Just walk to a mirror or pull one out of your purse, etc., and give yourself a smile. You're worthy of it and you are so worth it.
You can give yourself a long continuous smile for as long as you want, or quick little ones in succession. You can look away, sneak a peak and smile, and look away again, then sneak another smiling peak. Go ahead, make it fun, make it a game if you like.
If you would like more positive reminders that it's okay to smile at yourself, check out the products below. You'll find this smile at yourself design on stickers, magnets, mugs, business cards, and more. The designs aren't actual mirrors, you will still need to supply the mirror. These are just fun reminders for your new activity.
As you start to smile more, you may find yourself smiling at others more too, like in the line at the store, passing a person going in the other direction on the street. Don't worry if not everyone smiles back, this behavior may be new to them too. Just know that you gave them a smile, and that's a blessing in and of itself. And when they do smile back, well that's a double blessing.
Cheryl Paton
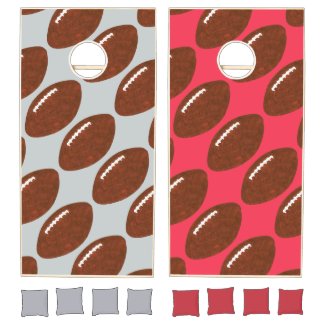
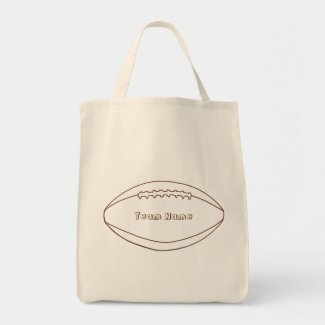
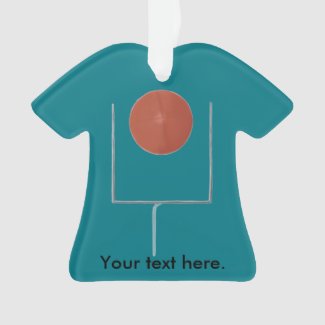
Here you will find a selection of customizable team name football t shirts, canvas bags, mousepads, hats, and more. It's fun to cheer your favorite team on, and also to join in tailgating fun with football themed cornhole game boards. Let the fun begin...
Below are examples of the various designs. The first one features a painted football tiled on cornhole boards; get ready for your own pre-game and post-game activities. Most of these designs have a template form to add your favorite team name, other text, or not. Just backspace on the template form if you don't want any text on the product.
You can also customize the background color of the game boards and choose different bean bag colors to coordinate more with your favorite team(s).
The outline drawing of the football is a great way for some coloring fun. The design and customized team name can be colored in using fabric paint markers. Be sure to place a sheet of flat cardboard between the layers of fabric before commencing to color or paint.
The painting of the football going through the goal posts is a great design to focus on goals and achievements.
Find more football themed products through the link below; it will take you to my CherylsArt on Zazzle.
Cheryl Paton

There are a variety of options for finding my pretty and functional designs.
The first one is CherylsArt on Zazzle. I have been working in association with Zazzle for over ten years now. You'll find a lot more of my designs on Zazzle. My main store there is CherylsArt. You'll find a lot of my very beginning designs there as well as new and more modern ones.
Sometimes the photo says it all, and you will find functional products with my own original photos at CherylsArtPhotos on Zazzle. Some of the photos are from my own local area and some are from vacations, etc.
If you are teacher or coach of literacy, and are wanting flash cards that are more suitable for an adult clientele, then check out CustomFlashCards on Zazzle.
I was a literacy tutor for adults for twelve plus years, and had to do a lot of creating to find products that were more suitable for my adult students. So this is the place to go, and you have requests for more flash card designs, leave your request in the comment section below.
Are you new to affirmations and want to give them more oomph? Then check out PositiveAffirmaiton on Zazzle. I have been using affirmations for years and have found that I really like having a visual with my affirmation. It helps to give me an image to focus on which helps to give my affirmation more power. The items in this store serves multiple functions, the function of the products, a pretty image, and an affirmation too!
Do you love flip flops and want your flips to have a more artsy look? Then be sure to check out TrendyFlipFlops. There are designs for various seasons, patterns, bridal, and more!
Last but not least, if you like books and everyday notebooks and planners, be sure to check out my Cheryl Paton author page on Amazon. You will find a variety of notebooks for kids and adults in various sizes, monthly budget planners, notebooks and more. Part of the more are some Children's Books and also Proverbs as Affirmations. This is another way to kick start some affirmations for those that were hung up on old Bible jargon of thou shalt not or else kind of language. If this message rings true for you, you can click on Proverbs as Affirmations, which is found on Amazon. You can read this book to experience a new way of thinking about God and Spirit. I have lived those old messages and one day in my search for a new way of understanding, I started the process of writing this timely and heart felt book. Yes, positive change is possible.
All the best.
Cheryl Paton